


Step 6:
We personally found her outfit a little bit to complex so we decided to remove some lines, and all we have done is just using a Brush Tool with soft edge and color that matches the clothes she is wearing. Using a medium size brush, simply go over her outfit, covering the shades and sew-marks. Don’t worry if it doesn’t look too organic yet, we will make it look blended in well later.
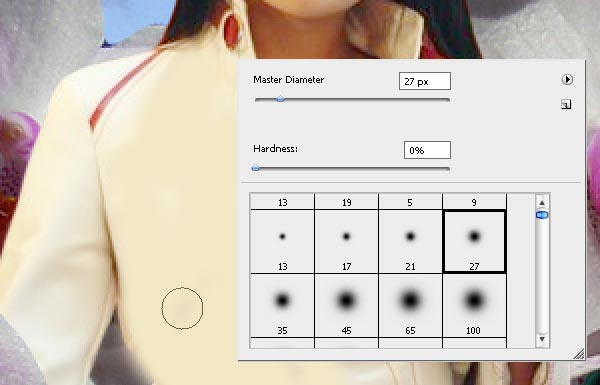
However, to avoid your painting over clothes look out of place, we are going to swap the blending mode of this layer from normal to Screen…

Step 7:
Fixing the girl’s skin is going to be our next step in this tutorial. Using the Blur Tool, go over her skin and blur it, especially in places that got pixelated because of the JPG compression, that is to say — near the transition to other colors.

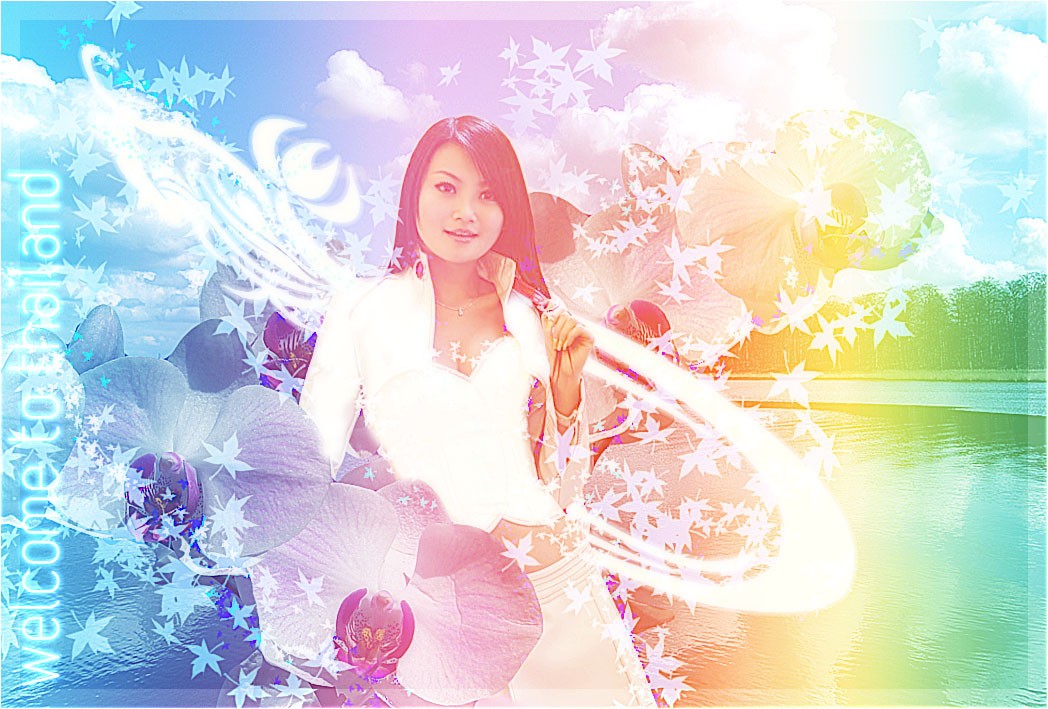
This should be your result so far, with the skin nicely smoothed, whitened outfit, overall photo adjustment of the layer:

Step 7:
We also want to add a nice twirly shape which will add some twist to our composition, so select any twirly shape you have in your arsenal, something that won’t be too complex or too. If you wish to avail of the same brush we have use, feel free to download the PSD file at the end of this tutorial.

Place the Shape onto the canvas, using White color as your Foreground color:

Step 8:
Press Ctrl + T to start transforming, Right Mouse Click to see the menu and select the “Distort” option, distorting the shape in just as you see below:

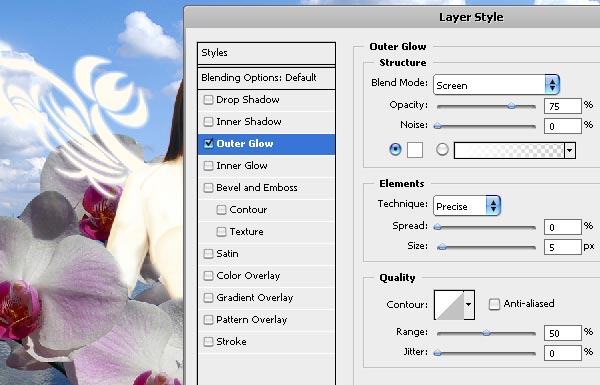
Go to Layer Styles option for this shape and apply glow using white color as well.
Step 9:
As any modern artwork, it should consist from plenty of layers with many little details. so Select the brush tool, and using the maple leaves brush, go to brush presets, apply the following settings:

and scatter it, just like this:

Step 10:
Use baby blue as your foreground and white as background colors, chaotically work with your brush across the canvas, trying to follow the flower and shape lines.

Step 11:
Set the blending mode of these leaves to “Screen”, in order to give it a nice semi-transparent yet vividly visible effect.
Using a much smaller brush, and a darker baby-blue hue, create a new layer and go with the brush over the canvas again, concentrating on the lady’s layer:

Very well written… Great tutorial, Appreciate your efforts. Thanks! 🙂
-Deepu
Thanks a lot, Deepu!
Very interesting use of layers, color, and a theme on tourist-oriented media…. But where is the PSD file to get the swirly flourishes for later use? I like those ones shown. Best wishes, and a wonderful 2010 to all!
-will
Oh, so sorry about the PSD, I forgot to add it. Fixed now, please refresh the page and download 🙂
Best wishes for you in the new year too, Will!
Good, beaatufil efect armoni
Sooooooo Cuuuuuuuute Thaaaaaaanks
I love your site I love the whole program in fact im gonna try it myself to see if its hard to create colors are awesome.
Thanks for showing me how to do it.
Richard
Doing the tutorial right now I downloaded the brushes but it says it’s not compatable with my PS I have CS4.
Hi, what is not compatible, the brushes..?
Great tutorial, thank you so much! Keep doing such things 🙂
it’s great… i like
thanks for inspiration
regards
heru
Wow man, this site is B-E-A-U-T-I-F-U-L! Good job.
For anyone serious about photoshop check this out (USA only) http://bit.ly/psoffer
[…] 24. Design Thai-Styled Angelic Artwork From Ordinary Photos […]
[…] Design Thai-Styled Angelic Artwork From Ordinary Photos […]
[…] Design Thai-Styled Angelic Artwork From Ordinary Photos […]
Thanks for the great info. I love your whole sight. I’m disabled and trying to start a photo editing business just to have something to do. I would love any advice you want to share.
[…] Design Thai-Styled Angelic Artwork From Ordinary Photos […]
Thanks, can’t wait to try this one!
My cousin recommended this blog and she was totally right keep up the fantastic work!
Links…
[…]Sites of interest we have a link to[…]……
[…] Автор: Lorelei Перевод: Игорь Арония. Ссылка на источник […]
[…] Источник: loreleiwebdesign.com […]
[…] Design Thai-Styled Angelic Artwork From Ordinary Photos […]
Very professional. clean and simple design and very easy steps.