Also, I strongly recommend to blur the layer a little bit by going to Filter >> Blur >> Gaussian Blur and set it approximately to 1. This will give the colors more mystic aura rather than dodge edge.
Step 6.
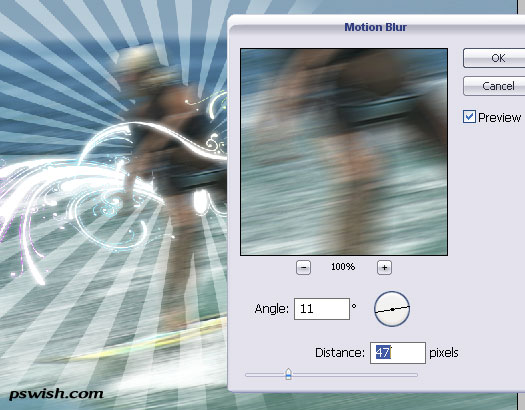
The next step in our Photoshop tutorial is adding some style to the image. In your layers palette, select the background image (surfing girl, in our case) and duplicate this layer. Go to Filter >> Blur >> Motion Blur.. and apply the following setting (remember, the blur won’t affect other layers, which is what we want).
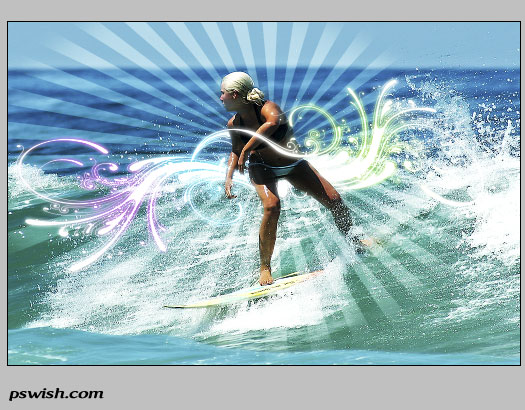
Set the blending options of the blurred layer style to “Overlay”, if your layers pallet. This will give a lot of bright yet naturally shiny contrast. Here is how your outcome so far should should look:
Step 7. (optional)
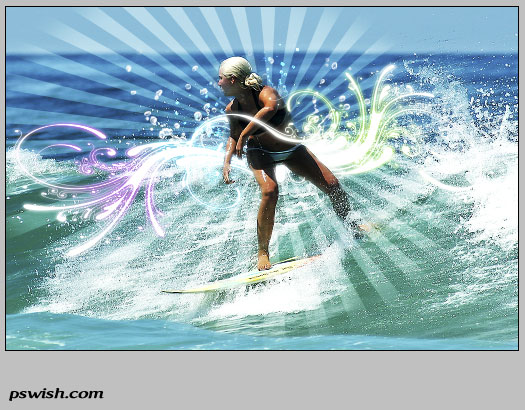
Just because our particular photo did not have enough breeze and spray, we felt it’s a bit empty and decided to add a little bit of splashing ocean drops behind the girl and set the layer opacity to 80% and Overlay. But yet again, this is optional and only if you feel the photo miss a few drops here and there.
Step 8.
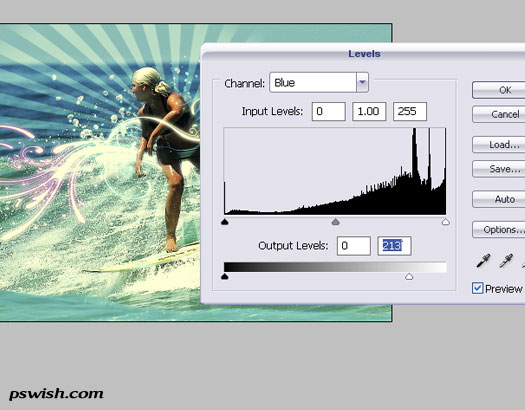
Now, make sure everything looks ok and if you are sure you won’t be playing around with any of teh layers anymore, Flatten Image (in your Photoshop — Right Click on the layers palette >> Flatten Image). This will give us the opportunity to work with image as a whole and what we are going to do now is adjust the hues of the photo in Levels Panel. Press Ctrl+L to open the levels panel and apply the following settings to give it a bit of a Lomo Photography bluish effect.
Press OK.
The next step is making the photo truly looking lomo and oldish, exactly like you often see in the Surf company’s adverts (example 1 , example 2, example 3). We are going to achieve this yellowing look of the 70’s in only one click but it may take a few attempts until you get it right. Open the levels palette (Ctrl + L) and in the RGB mod, select the gray droplet tool. with this droplet tool, we are going to define WHAT is our desired middle hue in this photo. I clicked on the darkest blue shade I found on the sea background to achieve a nice yellowing look. You can try clicking in other places and each time the effect will be different but essentially you need to pick a relatively dark and blue color, to achieve a result as below.
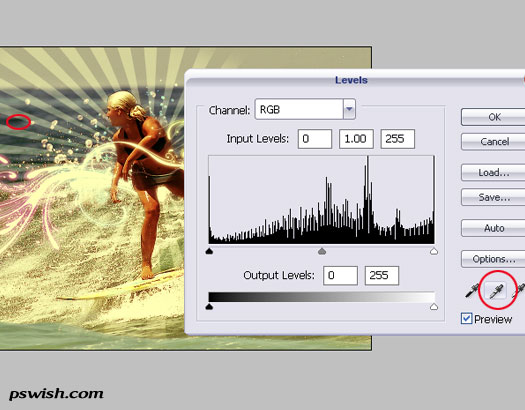
If it does not work out, you can always undo, thanks to the Ctrl + Z options, work in Photoshop was made a lot easier especially if you are trying in the trial and error technique.
Step 9.
Using the shapes or pen tool, add curved lines as we did below.





This is incredible. Thanks
I am really loving those tones used in the border, it caught my instantly
I found your site with stumbleupon and this Tut is very usefull and clear, I´ll back again…sure.
That is an awesome work bro… !
Really nice tutorial, will have to give it a try.
fantastic
I loved it. Thanks!
shape tool,“Registration target 2? download link
I think the are to much elements in the picture.
please…custom shape tool,Registration target 2? download link
I loved it. Thanks you
Nice one, tnx! *hang-loose* 😉
Hi, my daughters would like to create a surf label brand, and we would like to know how would get a start with our ideas please? We saw the young teenager on the television and know it is possible. My girls are very art orientated and have ideas to share with the world. We would like know how to be successful in this industry! Do we first have put together a portfoio on own ideas them have them secured and get a factory to make them or a sponsor ? We really would like to get a head start on this one please! Is there a website that can show us the way to the top?
Thanks for listening, we will still continue to search for answers Thanks Donna Bennett
great tutorial!Thanks
very nice tutorial – different than the usual fare and well explained – thanks a bunch!
Hey bro, wanna chill? The design elements dont seem to match, unless you really did intend for such a sharp contrast. Maybe you should tone down on the spirals.
this is very super
I dont understand what the “blurred” layer/duplicate photo does or adds to the image…can you explain more?
i think they should have printable versions of these tuts lol
This is great i definately need to try this one.