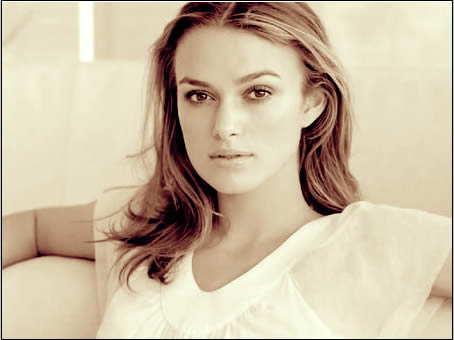
This is a rather easy way to create an originally beveled text, using Photoshop CS2. Before we begin, I should say that it would look best with Calligraphy and Handwritten fonts. For the example above I created a new 300 * 100 px layer (Shft + Ctrl + N) and filled it with black (Press ” D ” to choose the black colour, and ” G ” to select the filling tool).
Create a new layer and select the typing tool. Here we took the font called LaurenScript (click on the name to download it, free), Size 25 pt, “Smooth” settings.
Go to the upper menu, click “Layers” then “Layers Style” and “Blending Options”. Apply the following settings:
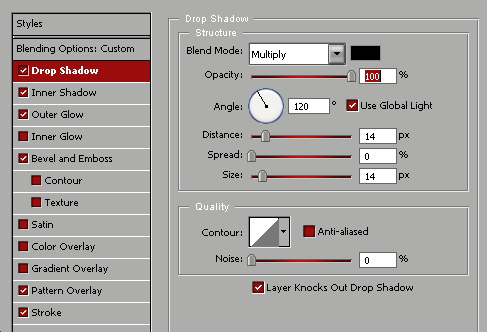
1. Select the black (#000000) colour for a shadow, using the “Multiply” mode. Set the angle to 120 degree, “Distance” to 14 px from the object, and also “Size” to 14 px. When these values are equal, the shadow effect looks more balanced, therefore we set “Spread” to 0% — which makes the shadow very delicate. You can skip the shadow if, like on the example above, you are using a black background. You you choose, however, pale or transparent background, this is how this bunch of settings is going to look (you not necessarily have to use text):
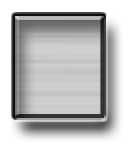
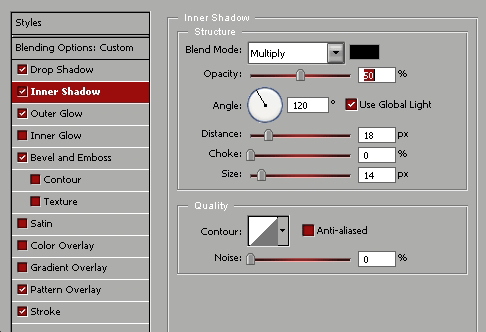
2. The Inner shadow gives a lot of depth to the object, especially if you use a large image nd not a text. this inner shadow creates the illusion of 3D and gives a more complicated look to the bevel emboss we will do later. Choose the black colour for the inner shadow, and set it on the “Multiply” mode, with the Opacity 50%. In order to make the inner shadow accompany the outer shadow, which I did first, we should set the Size to 14 px as well, Choke to 0% and Distance to 18 px. (for text it is better to set it to 18px, but for an object such as the box above – 14 px would look better). Using the same angle, which is 120 degree, will guarantee that visually we will get the impression of one light spot, and correct structure of a 3D object.
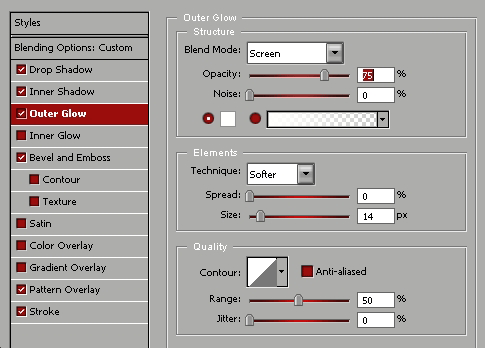
3. Adding t he outer glow will create a tiny light aura around the text. Set the blend mode to “Screen”, Opacity 75% (which are the default settings in most of the PhotoShop versions). Choose the white co lour #ffffff, (In order to change the colour click inside the colour’s box and pick another hue). Set the Elements Technique to “soft”, “Spread” to 0%, otherwise the glowing aura will cover the outer shadow. Size, again, 14 pixels. Leave the”Quality” on the default settings — “Linear contour”, 50% Range and 0% Jitter. This will give us a very delicate outer glow, almost invisible, yet interesting.. The more complicated a 3D object is, the more natural it looks on our flat screen.
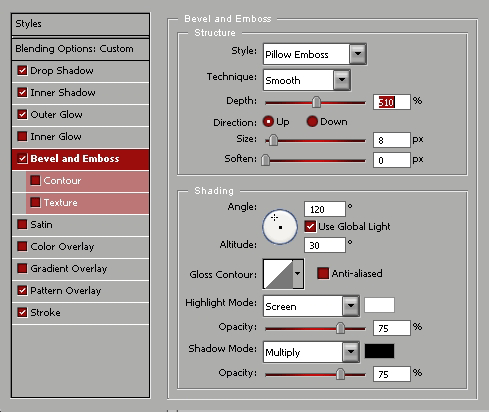
4. Now to the most important part – the bevel and emboss. Without these settings you can never achieve a complete 3D style. Choose the “Pillow emboss” style, “Smooth” technique and set the depth to about 510%. There is very little difference between 500% depth and 1000%, however a very visible difference between 1% and 200%. You may like the look of lower depth capacity if you work with an object such as button, however, for a calligraphy text, generally, the more depth, the better. Also, I have chosen
Pages: 1 2


