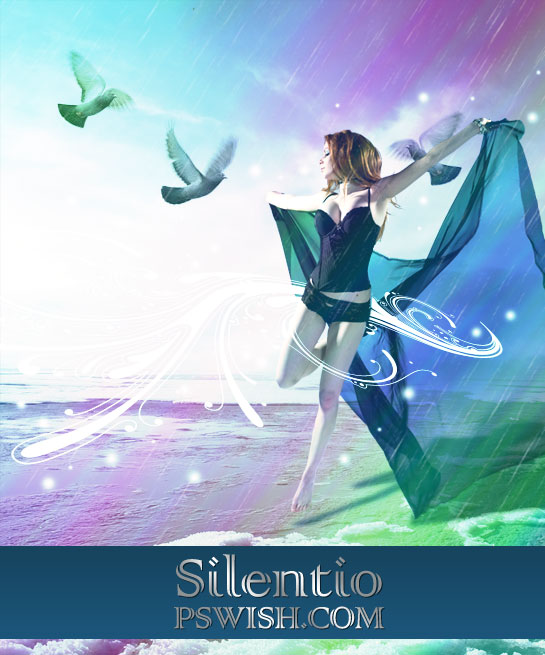
I can’t tell you how many requests I get, from people asking to make more Fantasy Art tutorials. Following the enormous success of “Plasma in a Lake“, “Fairy and Sunset Landscape“, “Mysterious moonlit landscape“, and “Sinking Moon Eclipse” (and some others)… I hadn’t much time recently and therefore made very little tutorials over the past months, but now I decided to give in to the massive-peer-pressure and make some more, truly amazing fantasy art tutorials for our read PSwish.com readers. Today you will be designing a beautiful moment seized in time, of a girl captured in a jump under the rain. This composition is called “Silentio” (and as you might have guessed, it means “silence” in Latin). I used to make more of a “dark fantasy art” previously, but now I am more fascinated with the light, colorful and angelic composition, that Photoshop allows you to create. Before I forget, if you want to share your result, feel free to add it to our flickr group.
So, Let’s get started…
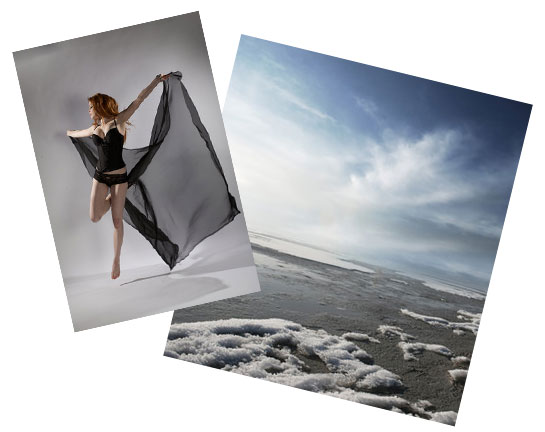
You will need a few stock photos to get started:
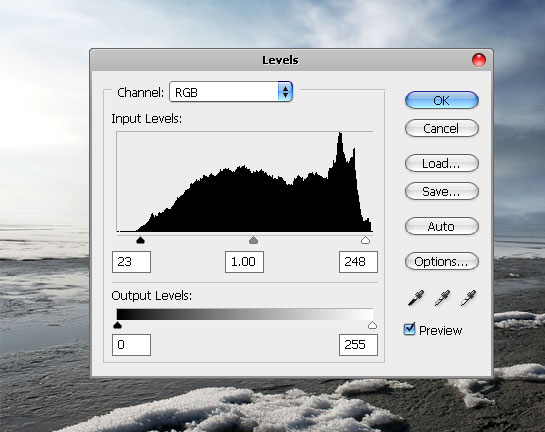
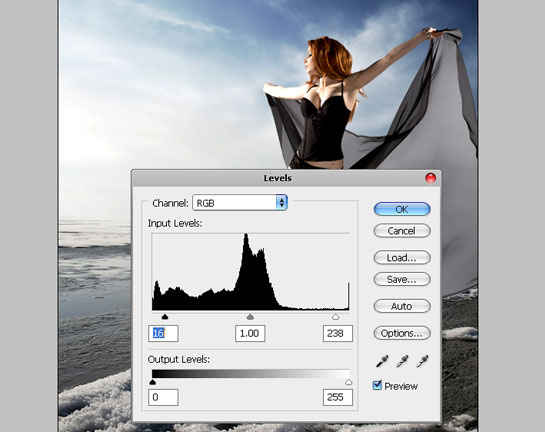
Open the landscape photo. First we want to adjust it a little bit because the original picture is a bit, so go to Image >> Adjustments >> Levels and set the following settings for RGB channel.
Now that our background has a better contrast, open the girl’s image and crop it carefully. We used Magnetic Lasslo Tool to do the cropping but of course you can also crop using the infamous mask technique, the choice is your. Once the image is cropped…
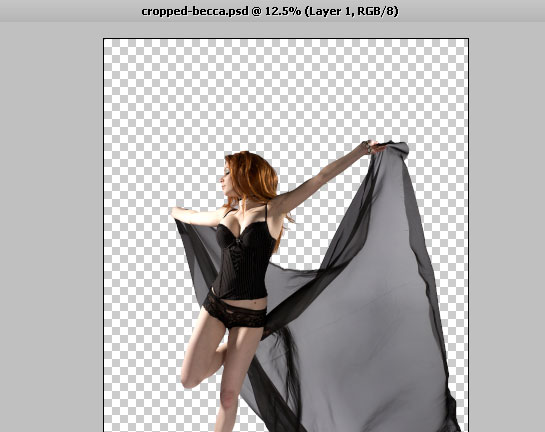
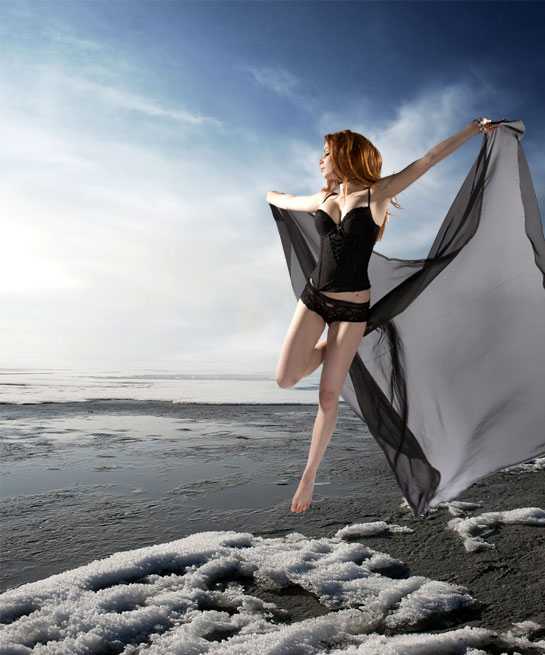
…place the girl on the landscape canvas, where you want her to appear. Remember, that we want to capture a jump, so she should not be too close to a ground or any object, if you have any on your background image.
After we adjusted the background using the Levels, we now want to adjust the contrast of the girl’s photo as well, to make it match the juicy shot of the sea. Open the Image >> Adjustments >> Levels panel and drag both arrows, white and black, a little bit towards the center to highlight darker and lighter aspects of the image.
Now, the trickiest part so please pay attention. If you mess something up here you might end up wit ha see-through lady or even without her at all. As you noticed, the veil is is holding, is nearly transparent, it’s a sort of organza material, but once we pasted the girl onto the seashore photo, the fabric is no longer see-through. But we want it to be.
This is quite easy to do but you might mess it up here so you will need to re-do a several times. Alternatively, scroll down to the bottom of the page and download our PSD file of this tutorial FREE.
- Duplicated the cropped lady’s layer.
- Make the first layer invisible for now.
- Set this layer’s opacity to “Multiply”.
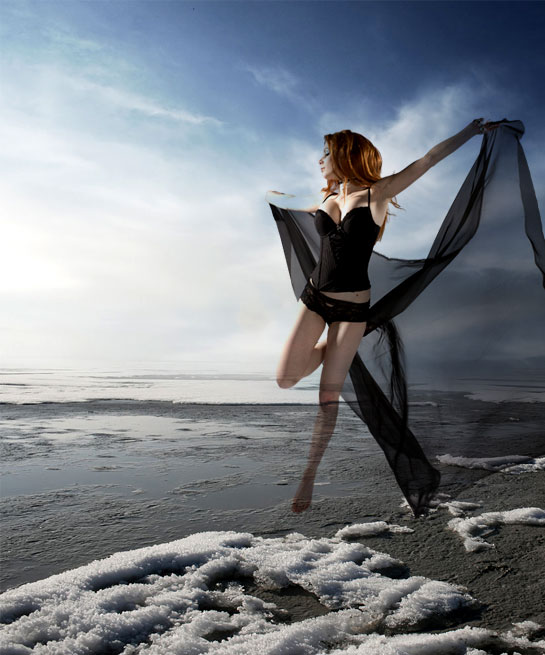
Make the layer you just set to “Multiply” invisible and bring the other layer back on the canvas. Leave it’s blending options on Normal, and crop the organza veil out, so that you will only have this on your canvas..
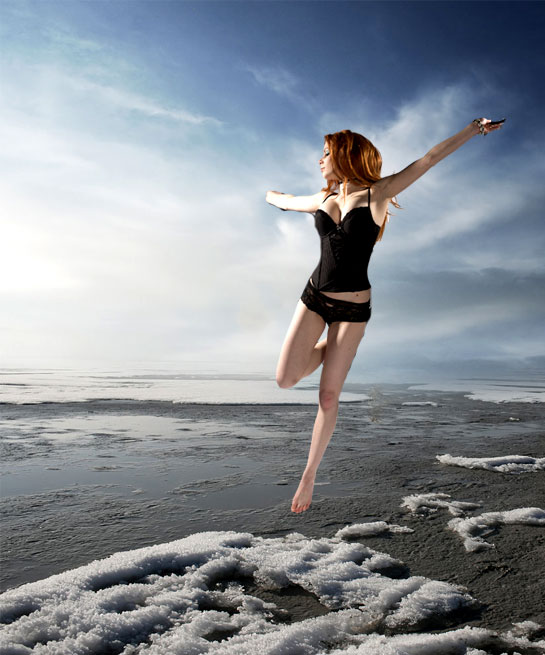
Switch back to see the layer you have on “Multiply” and crop the lady out, leaving only the veil on the screen..
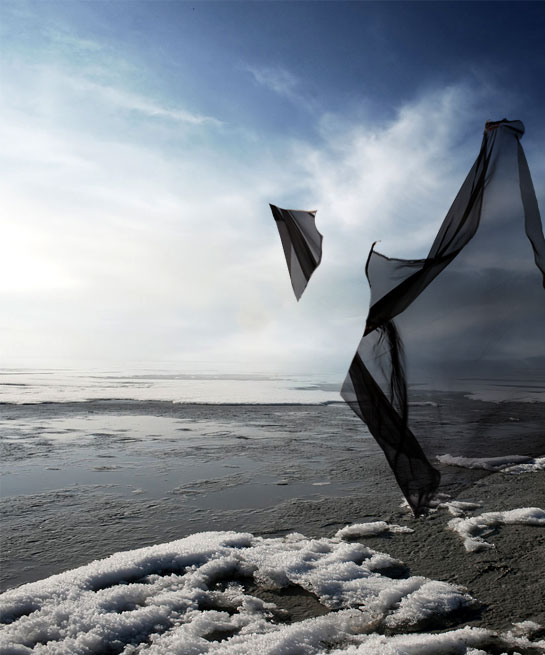
Time to do the magic — make both layers visible and there you go — you have a lady jumping with a see-through veil in her hands, through which you can see the remaining parts of the landscape photo.
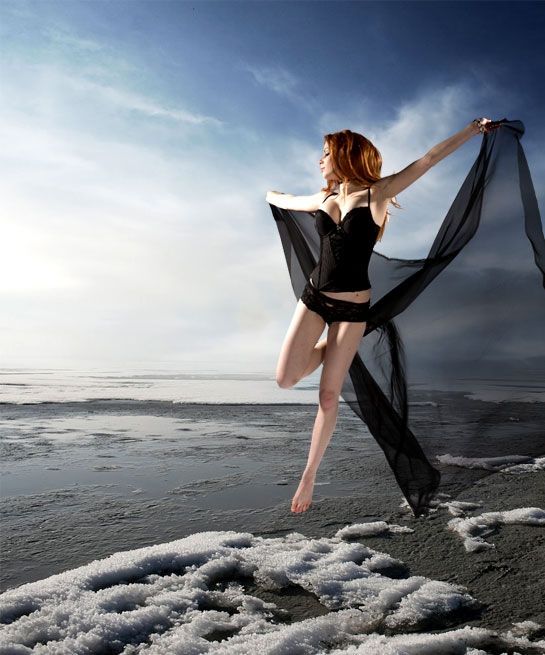
Since this does not look any natural without shadow, we are going to add a shadow, to create the full illusion of the girl being in the air.
If you had a third copy of cropped layer (which will save you merging and unmergining now) — just select the entire area by clicking on the layer in Layer’s panel, make a New Layer, and fill this selection with a dark gray color of your choice.
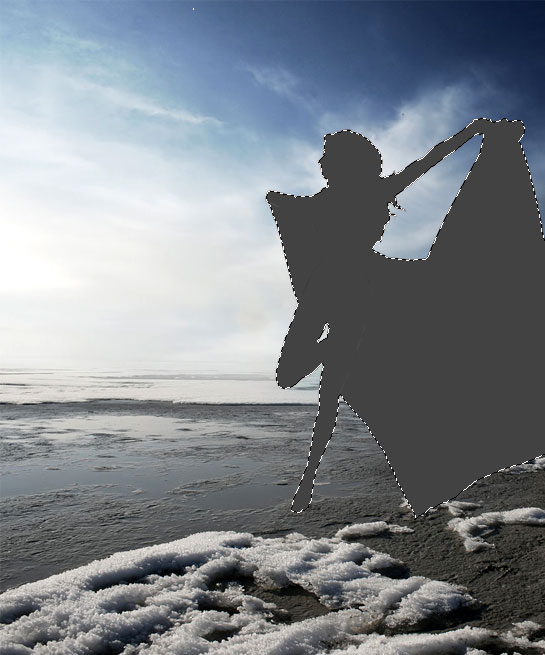
Take that selection and using the “Distort” option (available upon Right Mouse Click when you press Ctrl+ T) — place the shadow in a position that will suit your perspective point.

I also went ahead and pressed the shadow down a little bit to make it smaller, so that the light point will look natural.
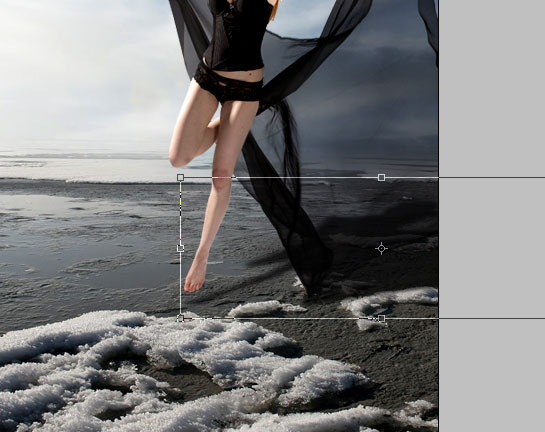
Since I wanted to give my composition is a nice angelic and touching touch, I also added a few doves, chaotically flying around the main character. I used this image of a dove, and just pasted it on top of the canvas without cropping. Simply set the blending options to “Multiply” as well and the background will blend in by itself, leaving you with a perfectly placed image on the composition.
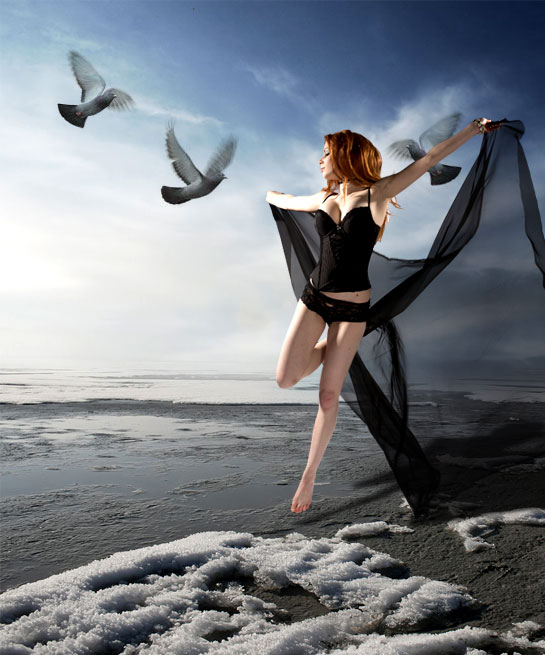
Time to give your composition a juicy angelic touch.
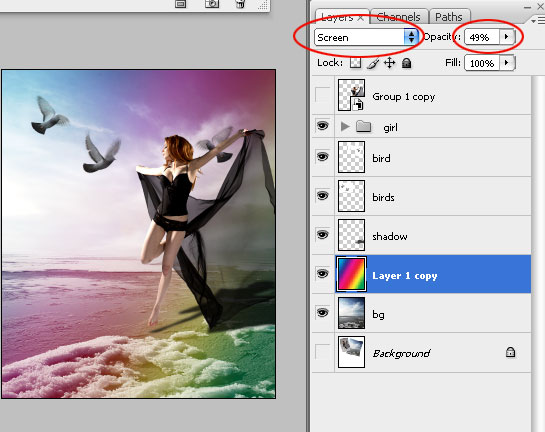
Make a new layer, and place it above the landscape background yet under all the other layers. Select the “Gradient Tool” and use one of the default “rainbow” gradients that come pre-installed with your Photoshop…
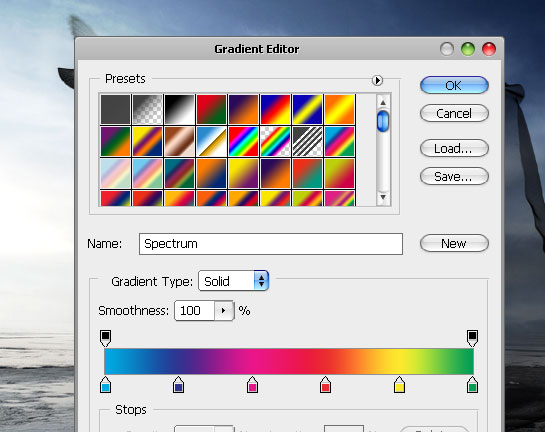
Draw a line for your gradient, using approximately the same angle as you see below..
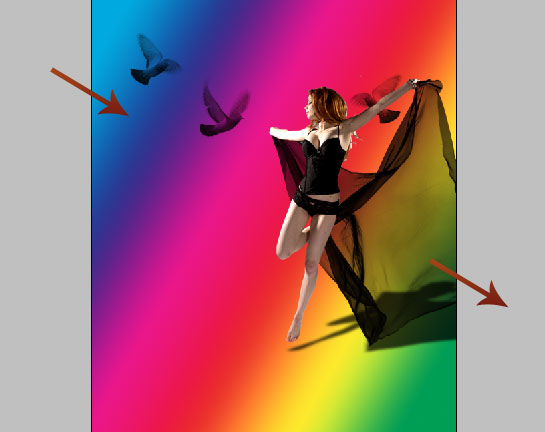
Set this gradient’s blending options to “Screen“, and Opacity to about 50%. I am putting the entire layer’s panel on the preview, so that you will see which layer should lay where in case you messed up anything by now..
This time we will add our trademark shape which you already seen in our other very popular tutorials — Surfing Girl fashion tag and design your Perfume Billboard.
You can download the shape here.
Make a big twirly shape on your canvas.

Press Ctrl + T, and upon Right mouse click, chose “Distort“. Position the shape in a way that will “wrap” around the girl under a natural angel.
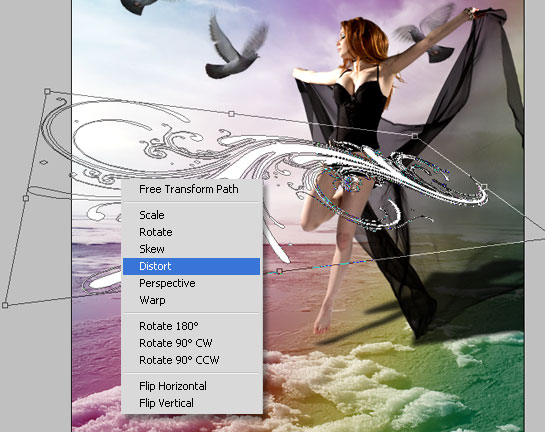
Press Enter. Now, resterize this shape and using eraser tool with sharp edge remove the pieces of the shape that lay OVER the girl’s body. This is what it should look like by now.
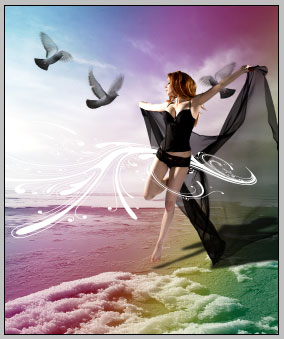
make sure you do it really neatly because if you erase too much, or too little, the effect will no longer be so natural, so it may help you to set the shape’s opacity in Photoshop to 50%, so that you will be able to see it semi-transparently, and that way you have far less chances to mess things up. It’s also highly recommended to work at zoom, even if your quality on the screen won’t be good, you have better chances to erase acuratly, compared to working in 100%.
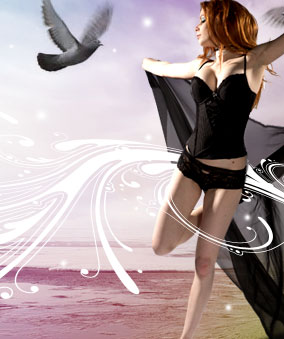
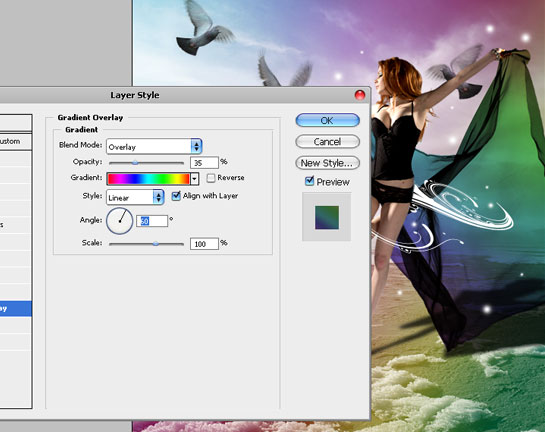
Next step. Let’s make the veil colorful as well, to give our composition a more cheery touch. Select the veil’s canvas, go to Layer Styles >> Gradient Overlay and apply one of the default, classic rainbows that come pre-installed with your Adobe Photoshop. Set the Opacity to 35% and Blend mode to “Overlay“.
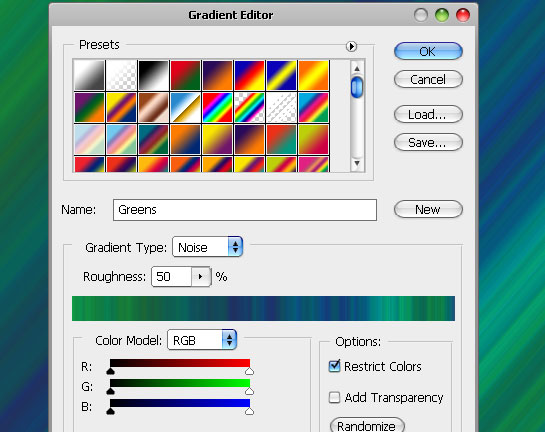
Still, we want more effect to enhance our composition. Create a new layer and fill it with this gradient, it also comes by default with all the CS Photoshop versions. Set gradient type to “noise” to achieve this kind of effect.
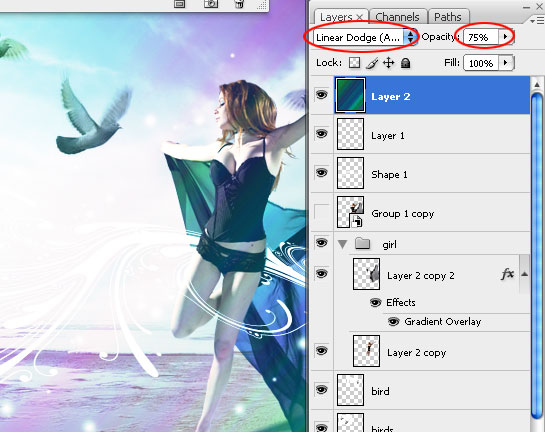
Make sure this green noise gradient layer in on top of all the others, and set it’s blending mode to “Linear Dodge” and opacity to 75%.
Next we want to add glowing little combs, flying around the girl. Using soft-edge brush and #ffffff (white) color, apply a few chaotic dots across the canvas, but try to keep them close to the girl and the shape, as if they fly about them.
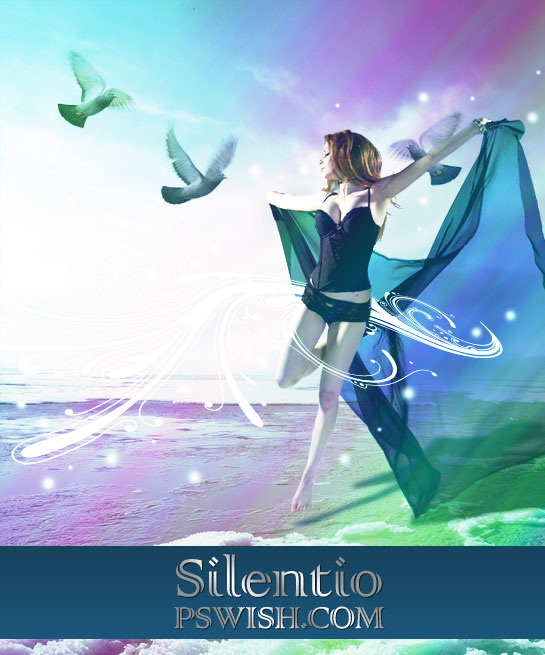
That’s all, this was our “Silentio” Fantasy Art Photoshop Tutorial for today. If you wish, you can also add rain using our previously posted tutorial about Rain Photo Effect. Hope you enjoyed this tutorial.
Please subscribe to our feed to make sure you will never miss a fantasy art tutorial or one of our exclusive freebies. Email subscription is also available, just remember to verify your email by clicking the link that will be send to you automatically.

Download the PSD (8.55 MB!)


