You might have similar effects on the web as such effects becoming very trendy recently. Doubtlessly you didn’t know how these designs are done, do they use patterns? Textures? How many layers do they work with? No need to guess and wonder, because now you are going to:
Make a new canvas, we used here #373d40 for backgrounds. Using white color as your primarily color, and Baskerville Old font, type the word you want to render…

Once you are done, duplicate the layer and make it temporarily invisible (click on the eye in layers panel). Get back to the second layer copy, which you have on visible mode and go to Layer >> Layer Style >> Blending Options
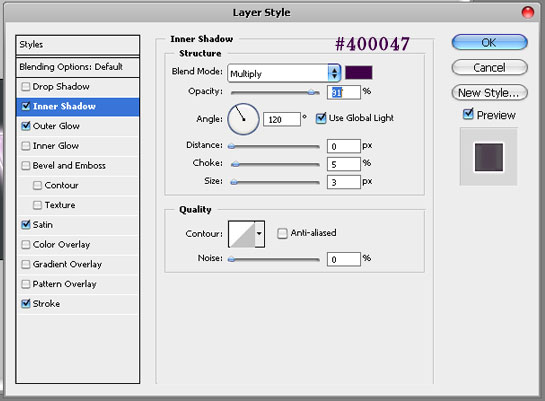
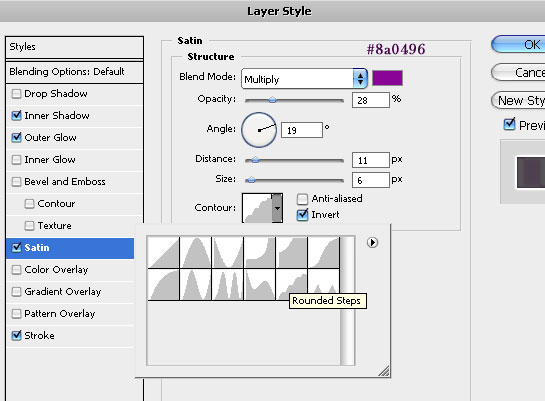
Apply the following settings for Inner Shadow, Outer Glow, Satin and Stroke…


Pay attention to the contour you choose, it has to be Rounded Steps otherwise you will get a different result. This Countour comes pre-installed in All Recent Adobe Photoshop versions.

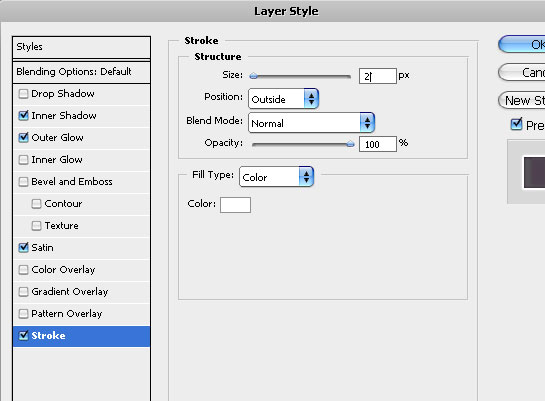
Finally apply a light outside stroke on the text, to give it a nice outlining. We did 2px but if your text is very big you may want to add a thicker line, or, on the contrary, if you are making a small logo, use 1 pixel outlining.

This is what you should get by now..
Pages: 1 2


Thanks For the tutorial, i think that this site is great for effective fonts thanks again!
nice quickie effect..me likes!!
I read a few topics. I respect your work and added blog to favorites.
I have tried this twice, and I still dont get the blocks in the text or the colour in the text for that matter? All I get is the faded blocks on the outside of the text.
sev, you should place the blocks behind the text!
wonderful! all genius is so simple =)
respect from russian photoshop user, author =)
Nice tuts, thanks for sharing.
maravilha briagadooo ..ameii