The popularity of text effects is not going downhills and even if you may think that all the possible and impossible effects have already been tried out, sliced around and milled over — be surprised, every week I get to see new Text Effect Tutorials for Photoshop and they always look great and always impress me over and over, so in the mood of winter we decided to put together another text effect tutorial, this one is extremely easy but has a very nice outcome, which I hope will prove useful.
Step 1.
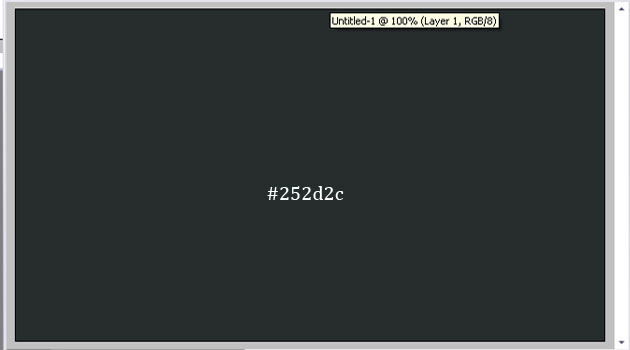
Open Photoshop and create a new canvas (Ctrl + N) of any size that will suit your needs. We are working with a relatively small canvas because we don’t need a huge one for our purpose. Fill your layer with #252d2c color.
Step 2.
Go to Layer Styles options and add Gradient Overlay from white to black, with 15% opacity. Use the Reverse mode, so that the white spot will be in the middle and not the other way around.

This is what you got so far:

Step 3.
Select the typing tool and write your word. We used “ChunkFive” font, Regular 127pt with Sharp edges.

Step 4.
Go to layer styles while the typed word is selected and apply the following settling


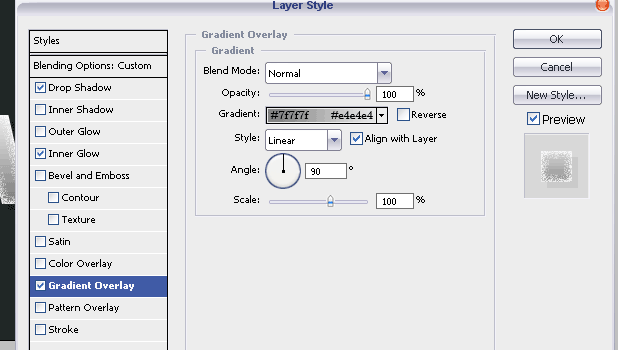
So far, this is the result you should be seeing. Should you decide to work with any other font, please bear in mind that for our purpose we will need a very BOLD font, otherwise the frosty dots around letters and the image we will be applying afterward will hardly be seeing.

Step 5.
Now we are going to take this beautiful image offered by flickr.com/photos/zitona

…and we are going lay this image over the text. Once you have pasted it onto your canvas, Set the Blending Mode to “Overlay”

Step 6.
Duplicate the layer with the leaves and set the blending mode of the TOP image, to Normal. Select the Eraser Tool, and using a soft brush about 65 pixels size, remove the entire layer, except for the bit with the leaves. So for the demonstration we blacked out approximately the past that should stay.

And here is what you see, the rest of the later sits “behind” the text and nicely blurred in the background while the leaves are popping out on top of the text.

Step 7.
Select the Marquee Tool and load a selection over the entire text. Go to Select >> Modify >> Expand, and set the expand mode to 5 pixels.

Step 8.
Once the selection is loaded, create a new layer on top of all the other layers and using gradient tool from White to Transparent, pull a line over the selection, from top to bottom. Photoshop can be a bit tricky when it comes to working with gradients, so see what works best for you, maybe start about 20 pixels away from the selection and pull the line just half way through the text, not all the way down. Just play around with it!

Step 9.
Set the Blending Mode of the gradient glow to “Overlay”, 47% or so, and send it behind the upper leaf, the one with “normal” blending mode.We are not hunting a dramatically visible effect, we just want to make a little outline.

Step 10.
Adding snow. Make a new layer on top of all the others. Select the brush tool, and use a small brush with soft edge. Using white (#ffffff) as your foreground color, start adding snow on top of the letters. You may need to play around with the brushes a little bit, using bigger ones on top, and drawing icicles with smaller ones.

It should look like the snow actually FELL on the letters, so do not add chaotically.

Step 11.
Apply the following Layer Styles to the snow layer…


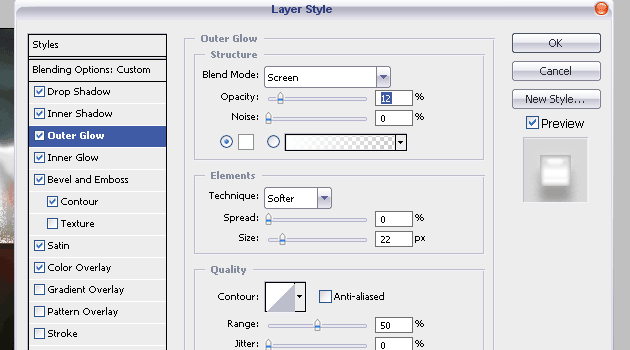
For inner shadow, use the #989898 – darkish gray color. This is meant to give out show a nice glossy and beveled effect, allowing us to outline the iciness we want to present.
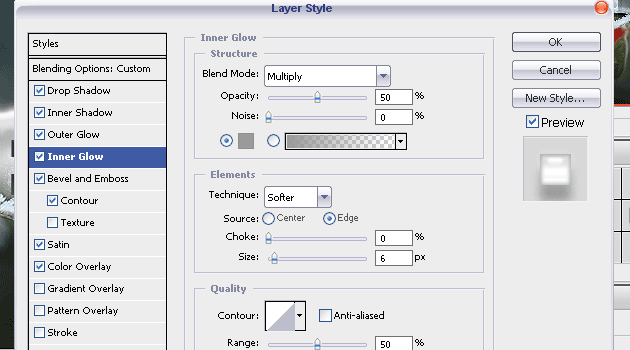

For contour, use the “Gaussian” contour, this is one of the default elements in Photoshop CS2+, maybe even in previous versions as well. If you don’t have this one, simply add a light curve to the default contour.

For color overlay we used #f7f7f7 light gray color. You may feel that you want to have the icicles more bluish, which will make them quite colder and much less realistic, but again — this is only a guidance, the more you add to the basic, the more creative your result will be.


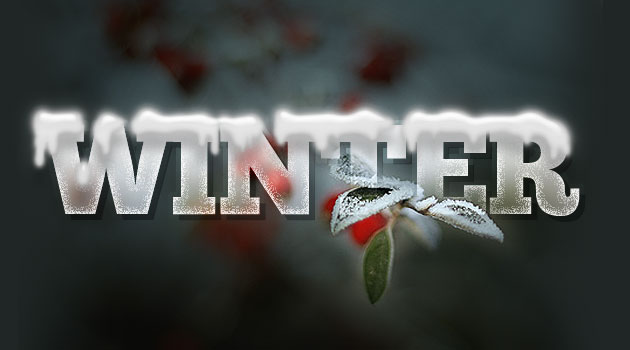
When you are done, your ice-covered letters will look like this:
Step 12.
Last bit is to add snow. I’d suggesting to use the SAME layer you worked with for the show, as it will save you the time of apply the same layer styles once again to the snow. So simply take bigger and smaller brushes with round soft edge and place dots all over your canvas.
Done! Please feel free to download the PSD file of this tutorial and subscribe to our updates, to make sure you never miss a tut you might like even more.





Nice tutorial thanks.
D?kuji za tutorial http://photoshop.nazory.eu/podle-http-loreleiwebdesign-com
Great tutorial and not to mention, beautiful site. Keep up the good work!
nice work
hey! thank you very much for this tutorial, i used this to make a clan banner for Christmas 😀
Too bad your server doesn’t load the images!!