and this is how it should look…

On the red part of the banner, place your logo, or write your website’s name in plan text and then go to Layer>> Layer Styles >> Options, and apply a slight stroke, ONLY if it suits your logo, otherwise just add your icon / logo and skip to the next step. So far, you should have something like this:

You can add a line saying “Special” or Xmas Special, using one of our previous tutorials.

Now select the Shape tool and using the rounded rectangular tool, draw a rectangular, half of which will slide down the canvas. This is the fastest way to draw a tab.

To give the tab a typical web 2.0 look, go to Layer >> Layer Styles >> Blending Options, and apply the following settings:
These 3 very easy layer styles will give you this very sleek and nice looking tab.

Using the custom shape tool, select the “Arrow 19” (included in the defaults set in PS CS2.) and draw a little arrow holding the Ctrl tab to avoid it losing proportion. Click Ctrl + T to transform the arrow so that it will point FROM the tab to the tab’s content (where you would normally place the price offer).
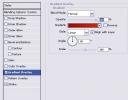
For the arrow layer, go to Layer >> Layer Styles and apply these settings:
And this is how it should look…

Add more about your offer, but remember to keep it short as you don’t have that much space! Enjoy.

Pages: 1 2


