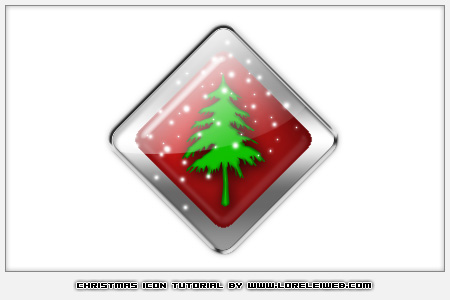
Okay, it’s been a while since I released a tutorial and it’s about time for a new lesson, so I thought Christmas would be most inspiring idea. We will be creating this high-resolution glossy Xmas icon:
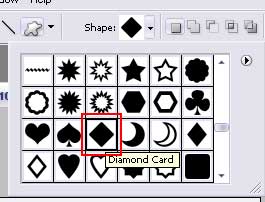
First step is make a new canvas n your desired size. Select the Custom Shape Tool “diamond card” (should come default with Photoshop CS2).
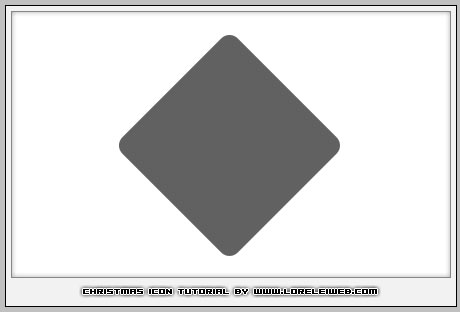
Draw a diamond while holding the Ctrl button, to avoid it loosing symmetrical proportion. The color you use does not matter since we will overwrite these settings with styles.
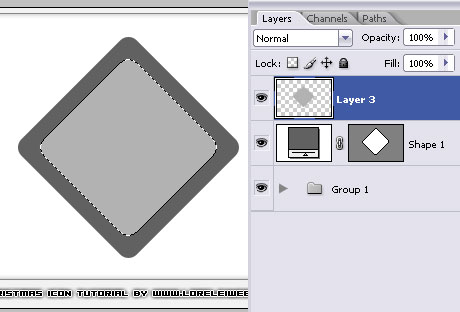
Hold the Ctrl button and click on the layer thumbnail to get the shape selected. Go to Select >> Modify >> Contract, and contract the selection in 15 pixels. this would determine the frame’s thickness, so its up to you what size to select. Once you are done, you will have sharp edges, so go to Select >> Modify >> Smooth, and apply it, using 10px smoothing effect as you can see below.

For your convenience, make a new layer and fill the selection in lighter colour, so you would be able to see more easily which layer is where.
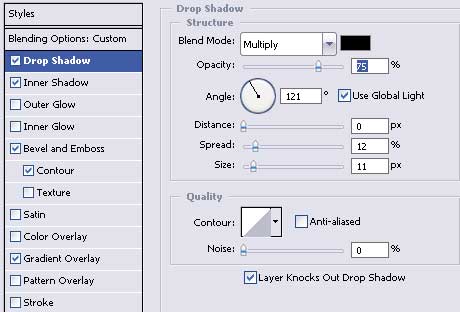
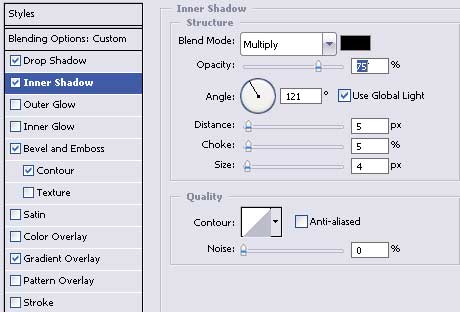
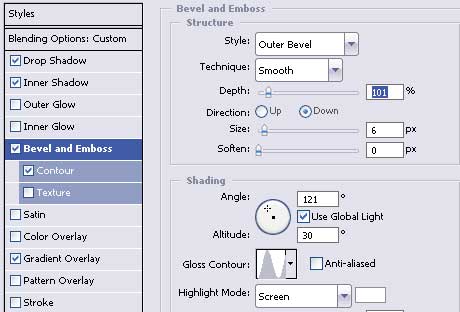
Now, make sure in layers thumbnail panel thefirst (bigger) diamond card is selected, ad go to Layer >> Layer styles >> Options. Apply the following settings.
The variations of gray and black do not particularly matter, as overall we want a greyish gradient and whatever shared you choose — it will look great. Here is the result so far.
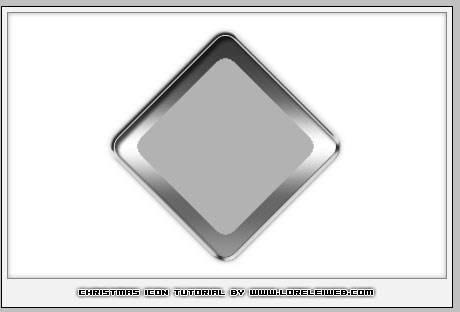
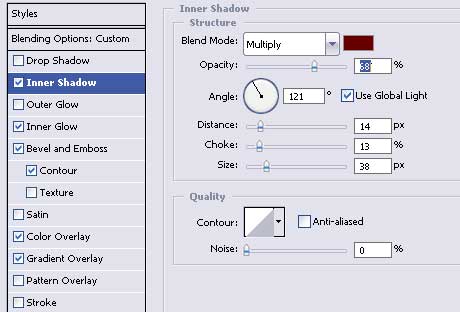
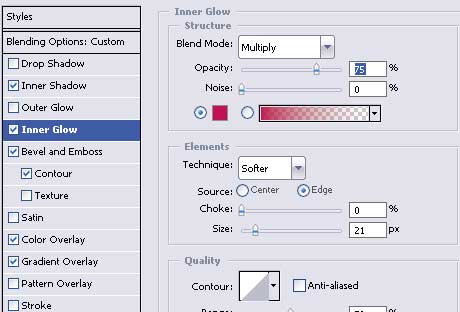
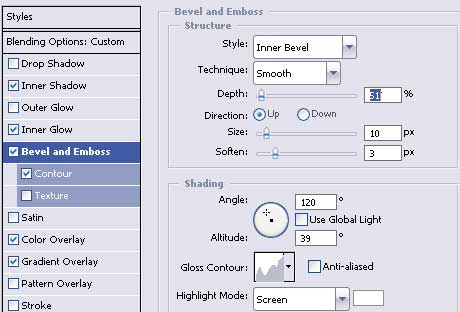
Time for the second, lighter and smaller box, so select it in the layers panel and go to Layer >> Layer styles >> Options, apply the following settings:
Use the #670000 colour for inner shadow.
For inner shadow use #e00a55
Pages: 1 2






I don’t know who u r. But I thanks a lot. Pls send me e-mail if u posts new blogs.