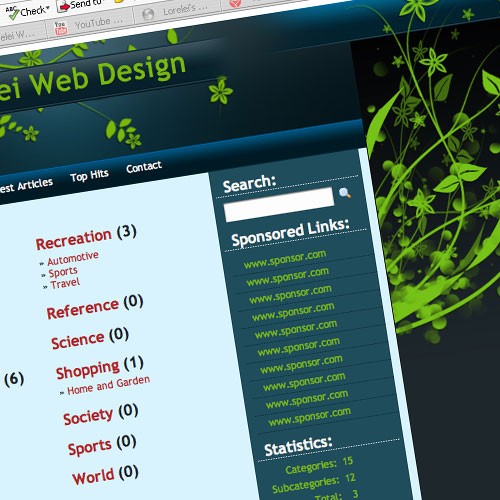
We will be creating this navigation menu for website layout.

Start off by creating a new layer (Ctrl + N). We used 600*120 pixels here. Fill the layer with white (if its not your default color). This will be your background.
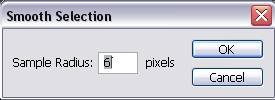
Now create one more layer and create a “box”, using the rectangular marquee tool. While it is still selected, and you see the dashed lines around it, go to Select >> Modify >> Smooth (as shown on the screen shot). This will make he borders round.

Type in 6. The bigger is the number, the rounder will the corners be.
Press “G”, of choose the Pain Bucket Tool, and fill the new layer inside the selection with any colour, except white, as shown on the picture below.

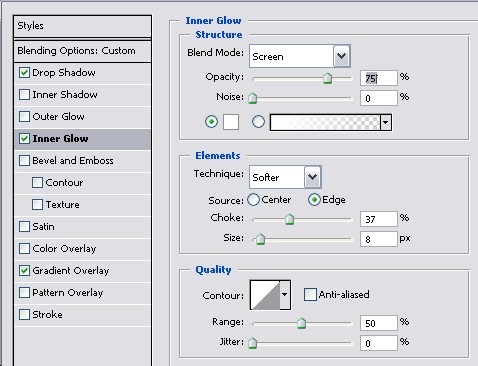
Go to Layer >> Layer Style >> Blending Options, and apply the following settings for Shadow, Inner Glow and gradient Overlay.

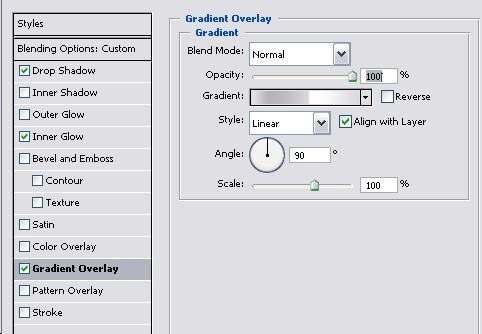
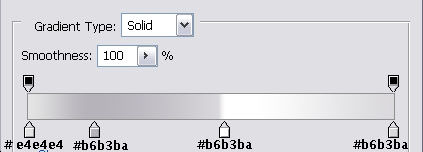
For the gradient itself, click inside the small window that previews the gradient effects (Below the “Opacity” line) and choose the following colours, in this very order. (see picture below)
So far, with the style settings you have applied, your menu bar looks like this:

Now select the Typing Tool (or just press “T”) and type the keywords that will become the buttons in your navigation menu. This will vary in every website, just make sure the words are not too close to one another and that you leave at least a few extra spaces between words. Here we made a huge menu, most people prefer it smaller (big menus will look bad in a busy design) so we also used a rather big font size.The font we used was Lucida Sans. After having typed all the navigation buttons, in any colour (as we will apply a gradient after), your screen should look like this:

Now go to Layer >> Layer Style >> Blending Options, and apply the following styles (be sure that you apply these settings to the text, and not to the navigation menu bar)
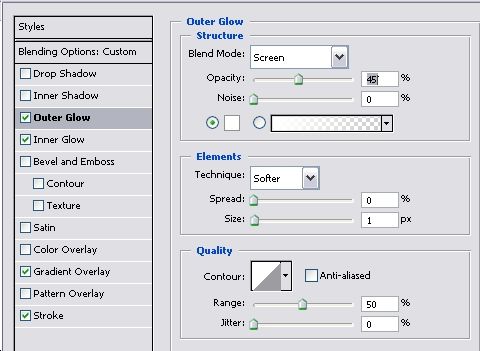
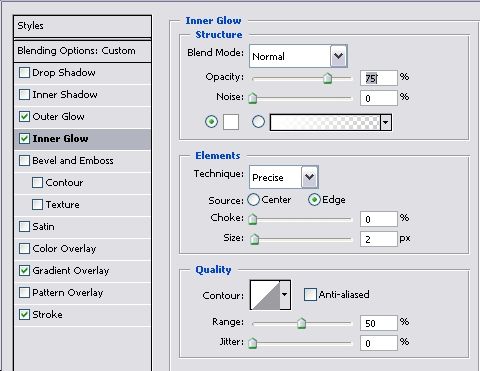
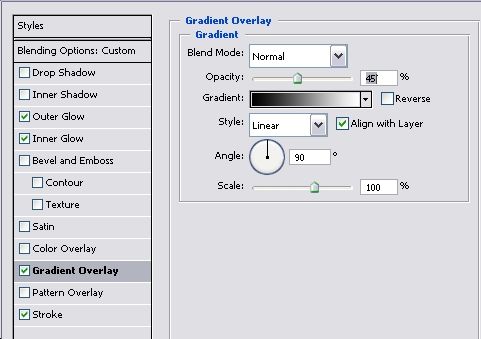
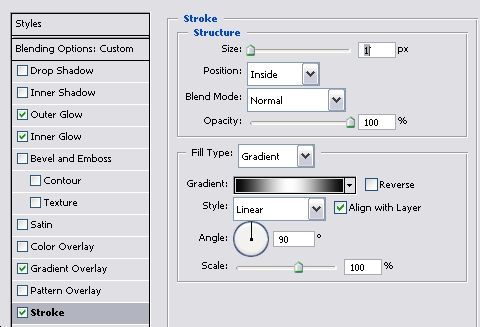
Here the gradient and the Stroke effect was simply Black and White.
So far, this is the result…

In order to turn it to a real clickable navigation menu, select the Slice Tool:

and once the slice is selected, Right Mouse Click on the blue corner with the number, and choose “Divide Slice”. Divide vertically to the number of buttons you have.
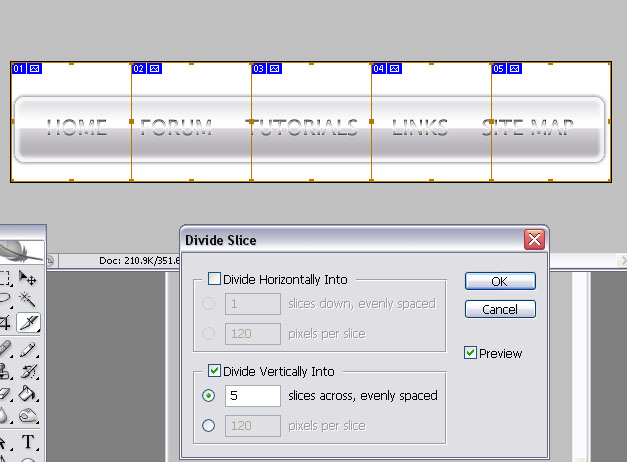
Click “OK”. Now drag the edges and try to place them exactly between the words. Don’t worry about it not been precise, these borders will not be visible afterwards.

Go to File >> Save for Web and save this menu as an HTML table with images. Be sure to optimize each cell separately and configure which URL will every button lead to, but even if you mess something up here – later, when you will be working in Dreamweaver or any other web editor, you can change the settings applied here. Most important, save it as a table which you will be able to use later on. Good luck and please post if you have any questions!


