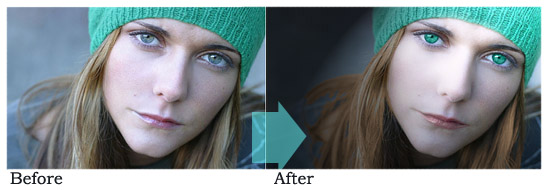
Lets start with changing the model’s eye colour to match her hat.
select a pen tool with the diameter that will match the radius of the eye. For this image, 28px was perfect.
Select the eyedropper tool and click somewhere over the bright side of her hat, make sure the selected colour was chosen for the primarily colour.
Incidentally, I have chosen #46b4a9
Select the brush again and create a new layer.
stamp the round brush over each eye, as shown on the picture.
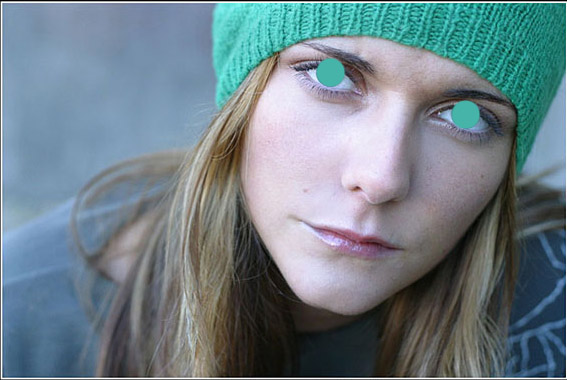
Now select the eraser tool and remove the remaining from the eyelids, you can even set the layer opacity to “soft”, ir order to see better what you are doing.
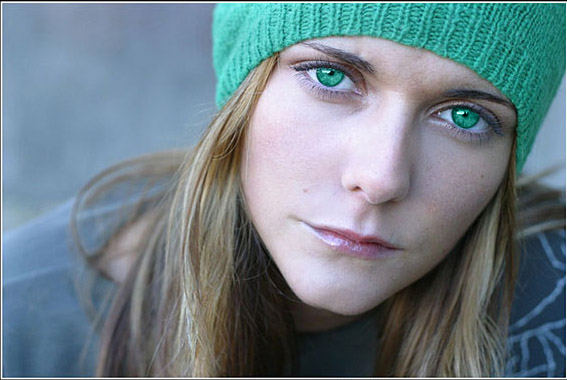
Set the opacity of the layer to “Color”. this is what u got:

To make the eyes more cat-like, select the Burn tool, with a soft edge round of 3 px, select the layer with the woman’s face (and not the one where you coloured the eyes, and go over the outer edge of the eye…
Preferable work with a zoomed photo, to make sure your hand won’t move in you will create a good round shape. this is the result after 50% midtone burn:
Now lets add some gloss to her lips. create a new layer and approximately 10px round (hard round) brush, and create a layer over the lips as shown on the picture:
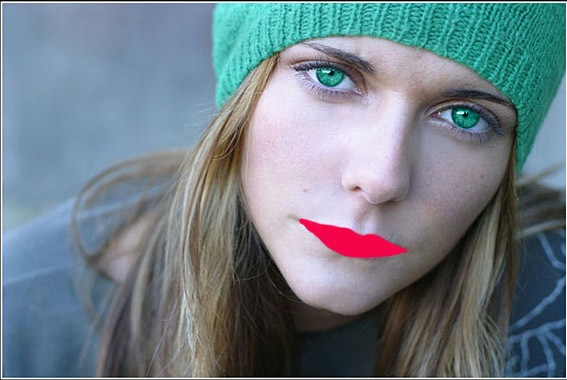
Now go to Filter >> Artistic >> Plastic Wrap and apply the following settings:
Highlight streignt 12
Detail 3
Smoothness 15
Click OK
Select the layers blend mode: Hue
Go to Layer Styles >> Bevel & Emboss >> Inner Bevel, size 1 px.
Highlight mode color: #4e1e1e
Shadow mode color: #ce8e8e
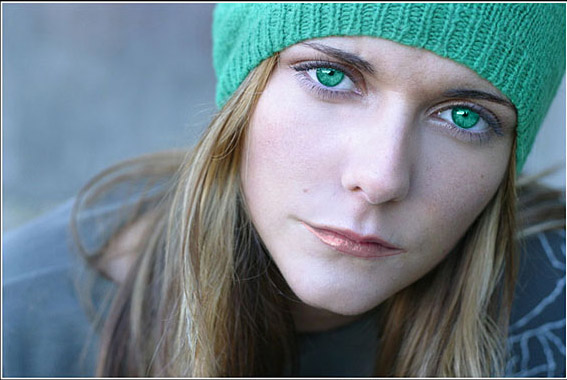
Your result so far is still casual. Let’s colour her hair. Select the layer with the woman’s face, and Magic Wand tool, select her hair (this will be done in a few steps as there are a several shades to pain in Photoshop here, and Press Ctrl + U. Colorize to #f37a05 colour.
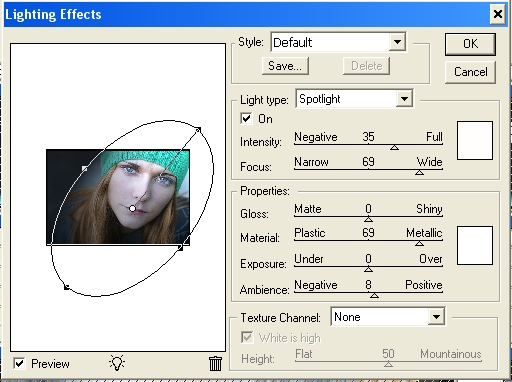
Go to Filters >> Renders >> Lightening effect and apply these settings.
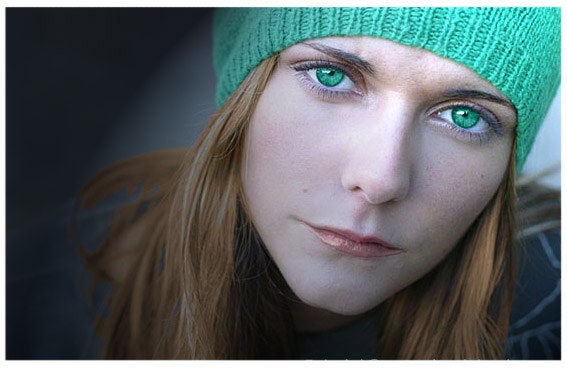
At last, add a bit of white glow, if you want, to add some professional touch to it. This is your final result, enjoy!


O ho…this is awesome…like the retina color…great one….thanks for sharing…