This tutorial was originally published on loreleiweb.com and moved for technical reasons. After the huge success of the previous two fantasy art tutorials, I wanted to do something like that again, but different… I hope you will like this one. Feedback is as usually appreciated!
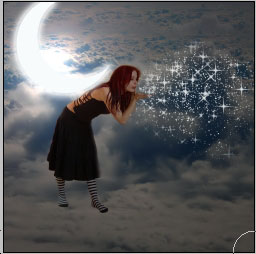
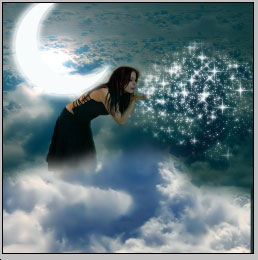
So, today we will make this:

Start off by making a new canvas, 500*500 pixels. The color is irrelevant as we will overlay it with a photo later.
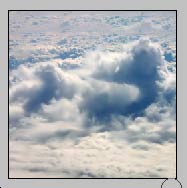
Fish out a photo of clouds from somewhere. I used some free stock on DA, but since YOU will probably make a picture for private use, you can use almost any photo u find.
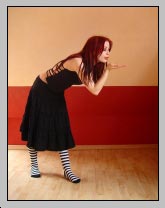
We are still gathering material. The next step is to find a nice girl we will turn to a fairy… As always, I used liam-stock.deviantart.com, but again, this is up to you. You may use your own photo just as well.
Select the clouds photo and paste it into your 500*500 canvas. Then, crop the girl carefully, and paste it unto your canvas either, above the clouds, more or less in the center.
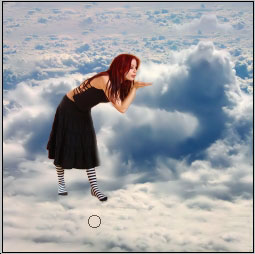
Make a new layer. Using a white color and a Brush Tool with a radius of about 250 px, make a “stamp” above the girl.
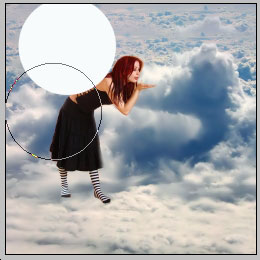
Now, just like we did in the Moon Eclipse Tutorial, using the eraser tool of almost the same size, cut most of the stamp you made in order to leave a small, “young” moon.
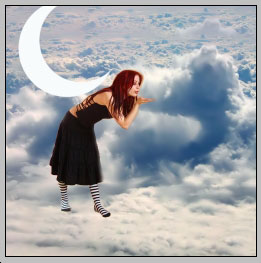
Go to Layer >> Layer Styles >> Outer Glow, and add White Glow to your moon. See illustration HERE.
This is what you got so far…
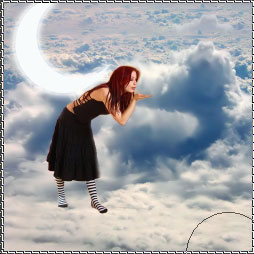
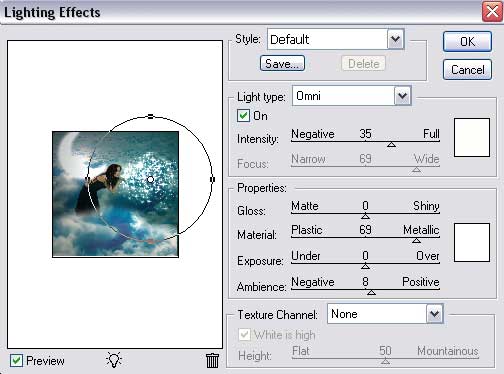
Select the Clouds layer and go to Filter >> Renders >> Lightning Effect. Apply this lightning effect exactly on the place where you have your moon.
Lightning Effect
This will result in having a darker sky around the fairy, and the only lit area would be around the glowing moon.
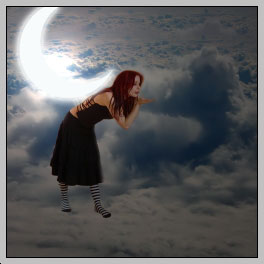
Now, we will try to create an illusion of stars that were laying in the fairy’s hands, and now that she has blown on them, they are scattered all across the sky. So, we need star brushes. Basically, any brushes you personally like on DA would be good. See the URL below for more info:
DeviantArt Free Star Brushes
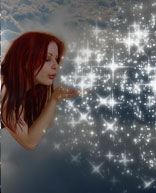
After having downloaded and installed your brush, make a new layer and apply several stamps of brushes close to the fairy’s hand, as shown in the picture below.
Apply the same glow settings as you did with the moon before.
Now some more complicated work, with Levels. As we want our sparkling stars to be really shining and the overall atmosphere of the picture to be bluish and mysterious, we will Flatten the Image (don’t skip it!!) and then press Ctrl + L (to get to the Levels panel) and set the following settings, for…
Red channel:
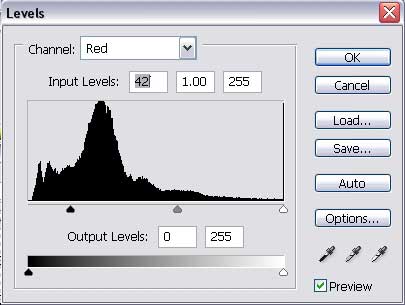
We got a much blueish hue to our photo.
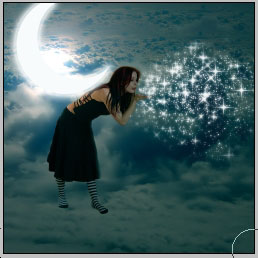
Please take a photo of the clouds u used before, and paste it onto your canvas once again. Make sure the new layer lays above the background.
Erase 2/3 of it so that the remaining clouds will only cover the girl’s legs, partly. Use the eraser tool with a soft edge, preferably a big radius, to avoid sharp and awkward edges for the cloud. It’s a cloud, after all!
While the new clouds layer is selected, go to the Levels panel again, and adjust the red level as shown below.
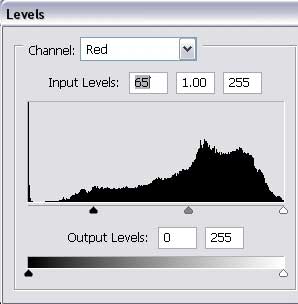
The settings must be different from the background layer to give the image more depth.
Flatten the image once more. Now it became one canvas again, without layers, so go to Filter >> Renders >> Lightening Effect and apply this light effect when the center of your light is the sparkles…
The last manipulation resulted in the following modification…
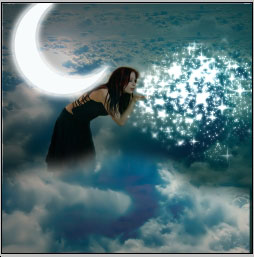
Go to Levels again and move the red channel settings and shown below to give the picture a “cold” feeling. (red hues are always more “warm”)
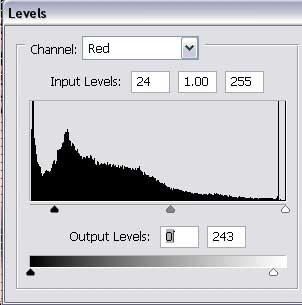
Also, move the blue channel settings a tiny bit towards the center… Adding blue channel intensity:

That’s it, here is your Xmas fairy, blowing sparkles right on you!
I hope you enjoyed the tutorial!

Did you come here looking for: magic fantasy art tutorial, fantasy photoshop tutorials, Christmas photoshop tutorials and fairy photoshop?
Photo Manipulation is a form of art that lets you carry your creativity to your computer screen in the form of a beautiful piece of art. Photoshop is the best photo editing tool that gives you enough flexibility and options to create some incredible works of art. In this roundup, we present some Amazing Photo Manipulation Tutorials for Photoshop. Follow these tutorials to learn some awesome artwork techniques.
Create new photo manipulation images.
An art as old as photography itself explores photo manipulation and learns about photo retouching, photomontage, image editing, and other photo manipulation techniques.
We are altering, retouching, and creating new photo art.
Image manipulation did not begin with the invention of photo editing software. Photographers, editors, and retouchers have been cutting, mixing, and making new work on existing properties for over a century. Image manipulation can be used for creative pursuits such as surreal photomontage or the creation of alien worlds on the cover of science fiction novels. “I would call it a medium of its own,” says photographer Eduardo Valdes-Hevia. “It’s somewhere between photography, painting, and more conventional arts.”
pictures. Keep doing your own job to get it out of there. Your own worlds will emerge, as you do, and your own vision will take shape.
The abuse of images and ethics.
It’s important to understand the history of photo manipulation. The popular image of Ulysses S. Grant on a horse in the Civil War is actually a composite of several photographs. Stalinist Russia has made heavy use of doctorate images for propaganda purposes. In 1982, National Geographic courted the uproar by altering Giza’s pyramids to fit into their cover.
If you are a photojournalist and you are trying to accurately reflect subjects, you should not mix or distort images in anyways. The National Press Photographers Association (NPPA) is very specific about this in its Code of Ethics, which states:
Editing should preserve the dignity of the material and background of the photographic images. Do not modify images or incorporate or change the sound in any way that may deceive viewers or mislead subjects.
Photo manipulation is for creative and esthetic speech, not for deception. With that in mind, this is how to place whales in the sky, aircraft in the ocean, and far-off planets in the sky above the earth.
Know your goals and plan ahead of you.
Before you combine some images or manipulate them, consider what you’re trying to do. “You need to have a very good picture of what you want,” says Edwin Antonio, an artist who blends contemporary fashion with historical fine art. “You don’t get distracted that way. Only concentrate on the target.”
In commercial work, you might want to eliminate the elements in the frame that distract you from the subject. “Image manipulation has always been used,” Antonio says. “Maybe there’s a trash can in the background or a line on the floor. My clients want the attention to be on their product, rather than a random item lying around.” By getting rid of unimportant visual features, subtle photo editing will draw the viewer’s attention to where it belongs.
If you’re making digital art, think about what you combine and what themes you’re going to use in your work. Know what you’re going to do before you start working. Have a good idea and description of your finished product before you shoot Adobe Photoshop. “It’s nice to write down ideas when you’ve got them,” says photographer Ronald Ong. “I draw them as ideas come up.”
Digital art, surreal scenes, realism.
Photographic art can break the laws of physics and reality, but it still has to abide by photography rules. “The image you are making should be as realistic as possible,” says Ong. Realism here does not mean making scenes that can be seen in real life. Photomontage and digital art can also contain science-fiction and fantasy elements. However, the minotaurs, sirens, and surreal scenes you make also need to have a realistic viewpoint, lighting, shadows, and color.
Use photos that fit well together.
Achieving realism begins with the combination of complementary images. The photos in which you work should have something to do with each other regarding factors such as color and light. “You can be brilliant and know what you’re doing,” Valdes-Hevia says, “but if you’re using two images that are completely different, with very different viewpoints or lighting, you’re going to have to do a lot of editing.” The more you’ve got to edit your photos, the harder your work is.
Get perspective right now.
Perspective is the first thing you want to do when you combine your images. Although it is possible to change lighting and colors in Photoshop, it is much more difficult to alter perspective. Get tips on how to add new objects to an image or subtract existing ones.
Fit the light and the hue.
After that, balance the lighting, going from the darkest to the brightest elements in your composition. “When you want to balance the lighting, you want to match the brightest color of your subject to match the darkest color of your history,” Valdes-Hevia says. “The same thing with the highlights.”
Matching color matching is the next step to bringing photos together. Matching shadows and their range of colors are significant. The ordinary spectator may not be able to explain why the shadows look wrong, but they will note it. “I still change the color and saturation settings,” says Ong. “Make sure that the shadows blend into the background. Brightness, contrast, shadows, highlights—try to blend it.”
Control subjects and camera elements.
Finding stock images or other existing photographs with complementary features is possible, but the best photos are often the ones you capture in a supervised photo shoot. “It always looks better if you take your own photos so you can prepare ahead and fit all the lighting and perspective beforehand,” Valdes-Hevia says. Having shadows and perspectives to line up and work together is a lot easier if you’re the one who first created those shadows and perspectives.
When you edit, make sure you can go back and change stuff or restart your workflow. “One of the first things I had to learn was how to edit non-destructively,” Valdes-Hevia says. “Make sure you can go back later and change the things you did at the beginning. Masks are mates of yours.”
Practicing the art of manipulation of images.
Creating new images from existing objects is challenging but satisfying. The only way to make things successful is to do it. “Work on it. Try different things, please. It’s not going to look great at first, but it’s all about practice,” Valdes-Hevia says. “You’re going to develop an eye for realism, perspective, lighting, and colors as you go along. Don’t get discouraged by that.”
Create composite images
Make two images of a single picture. Discover the techniques of photo editing to produce dramatic composite images.
Get the specifics of the consequences of double exposure.
Double exposure is one of the oldest photo effects ever seen. Learn how to do this more effectively using new technology.
Know your tools while you work. “I learn the most playing around in Photoshop,” Valdes-Hevia says. “I think to myself,” he said, “I never clicked on this. What is it doing?'” Be interested, inquire, and learn about the app. “Know the name of each tool and what it’s used for,” says Antonio.
Increase your budding skills by learning photo manipulation tutorials. Find examples of photo manipulation and try to work backward, and find out what the artist did. Play around with your stock



nice tutorial, looks really effective, these tutorials are really appreciated
This tutorial is featured on Top 50 Christmas Photoshop Tutorials
Thank you!!
Very nice, but not really seasonal !
thx for the tutorial can you put the link for the brushes and stock i will really appreciate that.
An impressive tutorial, using a wide range of tools to create effects I wouldn’t have thought of previously. I wasn’t aware of the many add on brushes available for Photoshop, so I will be looking this up shortly.
Using the lightning effect on the stars is particularly impressive, as this is an area of Photoshop that I find can be very powerful, but just requires a bit of knowledge to get a decent result out of. I wasn’t aware how much adjusting individual levels can help create an atmosphere, such as in this case by reducing the red channel, and again I will be using this in the near future. Has anyone got any further methods for creating similar effects? Thanks for any tips, great article!
verygood
I learn to new idean. so I use this word.
Muitooooo bom manifico..obrigado..
Thank yoo for your workflow.
It´s good for Newbies like me.
I stumbled across your amazing picture when looking for something for my blog. Is there any chance I could use it on my blog if I give your site credit?
nice tutorial, very cool….