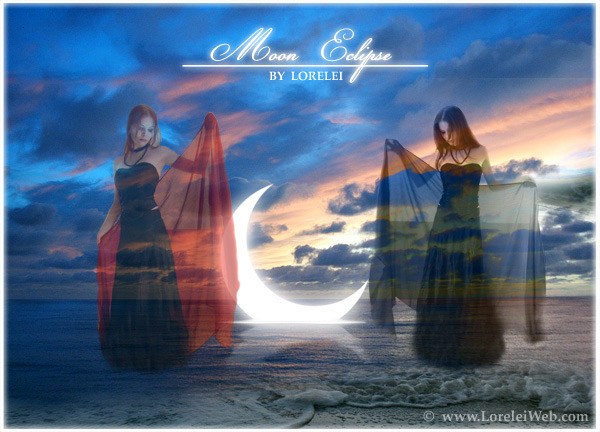
After having made the Moon Eclipse for DeviantArt, I was asked to write this tutorial for a several times and I decided to give in and disclose the secret – how do I make the “sinking moon” effect. I tried to re-create that picture, yet naturally it did not turn to be identical… Hope you will not discover that it was disappointingly simple. Nonetheless, I must say that this tut is for more advanced users… anyway, today we will be making this masterpiece:

So lets get started.
You will need two waterscapes. I used this one for the the shore edge:
and this one for the primarily background image:
The image above is watermarked, if you wish to download the full resolution image, please go HERE
Next, select and copy the first picture, and paste it unto the canvas of the second one. Erase most of it, leaving only the shore’s edges, and set the opacity of this second layer to 89%.
Making the moon:
Make a new layer. Select the brush tool, #FFFFFF color, 135 px size, and apply one stamp in te middle of your canvas.
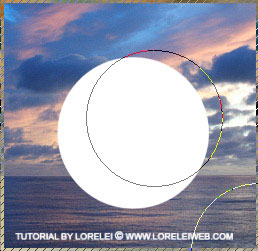
Select the eraser tool with sharp edge, and “cut” with eraser’s tool side, most of the circle, as shown on the picture below.
Now that your moon has just started to develop a shape, using the rectangular marquee tool, select the bottom of the moon and cut it, just like we did here:


Great article . Will definitely copy it to my blog.Thanks.
[…] “Fairy and Sunset Landscape“, “Mysterious moonlit landscape“, and “Sinking Moon Eclipse” (and some others)… I hadn’t much time recently and therefore made very little […]
[…] Sonra DeviantArt için Ay Tutulmas? yap?lm?? olmas?, bu bir kaç kez ö?retici ve I vermek ve s?rr? if?a karar yazmak – nas?l “etkisi” batan ay yapabilirim istendi. Ben yeniden çal??t?, ancak do?al olarak özde? olmak dönmedi … Umar?m bu disappointingly basitti ke?fetmek vermeyecektir resmi olu?turun. Yine de, bu tut daha ileri düzey kullan?c?lar için … Zaten söylemeliyim, bugün bu ?aheseri yapacak: […]