upper text layer is selected and not the background or the layer underneath it.
 On the left you can see an example of what you are supposed to achieve so far.the selection might look a bit dodgy but this is fine, since we are going to achieve a cracked grass effect on top of it. Now, I recommend to zoom on your picture so that it will be much easier for you to work with selections when you can see hem better on your screen. You are going to repeat your previous path, only this time you will select all the remaining area around the text. Using the lasso tool, start from the side of the canvas and when you approach the letters, try to repeat as precise as possible the previous selection path.
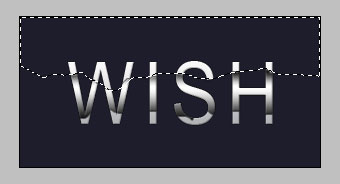 You will not be able to follow it exactly, but this is why we want a NEW selection and not just invert the previous one. We don’t want it to look too sleek and polished, it has to have a bit of a cracked charm.
Important: When you selection is ready, make a new layer and drag it in your layers panel so that it will end up being under both text layers. This is very important and not locating the layer in it’s proper position will prevent you from achieving the right result.
Now, select a Brush Tool with master diameter of about 100px and, most important, soft edge. Very gently try to make a “haze” that raises from under the lower edge of the selection. I recommend starting way under your selection and go up bit by bit when you see you want to get more glow.
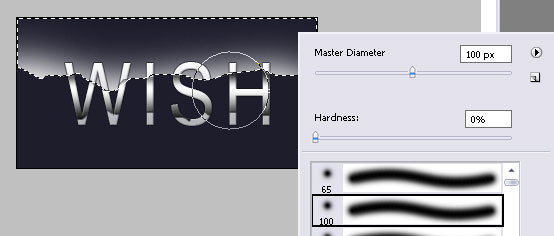
Repeat the same process with the lower part of the text, loading a selection, more or less following the previous path and then using either a new or the previous glass layer, adding a little white glow. That’s it, this is your result and I hope you like it!



Just been browsing around the site. My first visit, I love it 😀
I’ll definitely be making use of this tut.
Also be adding you to the list of photoshop resources/tutorials on my site 🙂