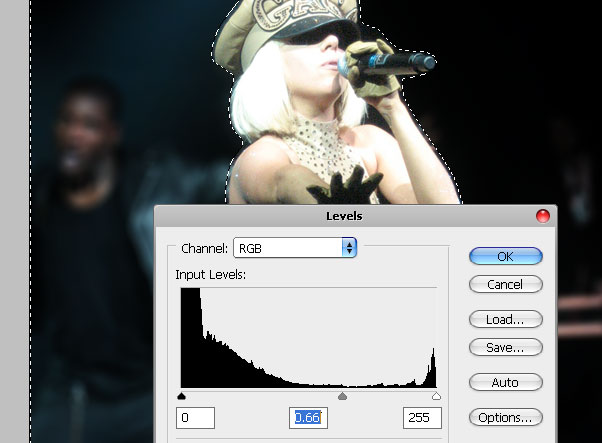
go to Image >> Adjustments >> Levels and make the background darker suing the RBG channel. This trick instantly makes the main figure standout so we focus directly on a sharp, perfectly lit object, rather than on the blurred background. This trick will also work good when you want to make someone stand out in a photo that was taken against a very vivid background that “swallows” viewer’s attention.

Finally, when you are done that, you can press Ctrl + D, to leave the selection behind.
Step 5.
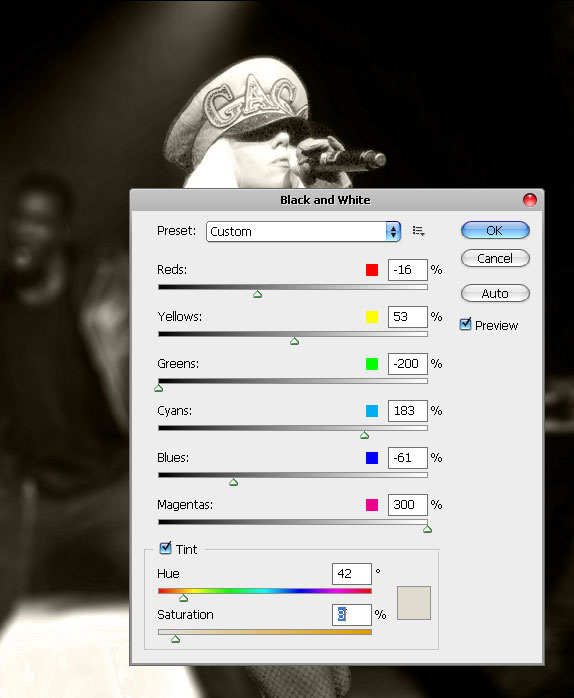
Find the “Create new fill or adjustment layer” icon in Photoshop Layers Palette, click it and chose the “Black and White” option. We are going to make this photo black and white but this won’t be the ordinary black and white photo where we simply cut the colors out and make the image grayscale. We will use this smart filter to adjust each color individually.
For example, The skin consists from red and yellow tones, so by making these tons darker, your black and white photo will look as if you (or anyone you are working with on your picture) was very much tanned. You need to play it it for a while in order to really dig all the possibilities that this filter allows you, but for now, you can follow me and copy the settings..

Note that we added a mild beige Tint. Leave this option out if you want simple black and white photo, however I recommend to add the sepia effect for more professional touch.
Step 6.
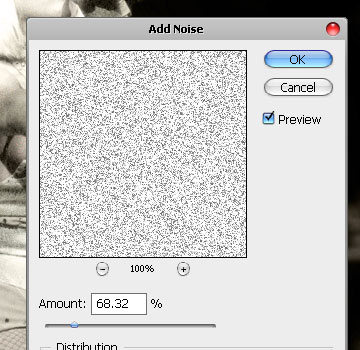
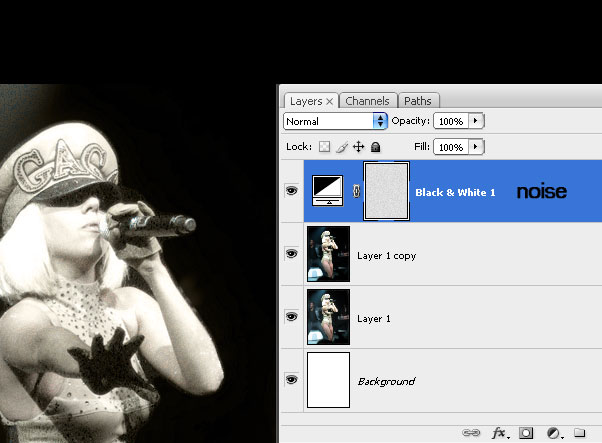
While the Black & White Layer is still selected, go to Filter >> Noise >>Add Noise and… add noise! Don’t be stingy, in order to be visible, we need to add quite a lot of this noise, even though the opacity of the BW layer is set to 100%.

See how you are doing so far?

Step 7.
After you done with the BW layer and noise, find the “Create new fill or adjustment layer” icon again and click it, this time select the Curves option. make our image even darker, but not using the default Linear curve, make it a bit more rounded.

Done.
That’s it, here is your result! Hope you enjoyed this tutorial and when you try this tutorial out, try using even the most ordinary photos taken in your backyard, and you will see that the results will be impressive. Good Luck!


Indeed looks quite PRO.
you guys are amazing artist..I just use one of the trick and got apprecited by client.thank you very much for sharing your knowledge.smith
[…] click here to: View Full Tutorial […]