Lately, after the success of my previous Photoshop Tutorial “Fallen Angel’s Dream Fly“, I got an interesting email from a girl saying that she admires my art and style, but she wish the tutorials were actually a lot more simple, with less steps and complication, a quick an interesting photo effect that a newbie can do in under 10 minutes. When I thought about it, it actually makes sense because not everyone has access to a huge database of stock photos, not everyone has hours of free time to spend with computer (and Photoshop) and not everyone eventually can follow all the complex steps, so I decided that we will be making tutorials from now on for 1. complete newbies and 2. for advanced users. here is is one for newbies, you can do this effect in about 10 minutes and use your own photo! This is probably the simplest tutorial ever. You will learn to use channel mixer settings and turn a regular photo to a pop art.
What is actually a “pop art”? classical pop art stuff were made based on a photo, where the curves and the contrast were distort so much, so that the picture turned to just black and white (or other opposite colors), with very distorted curves. Classical pop art pictures, the first ones, came in green-red colors scheme, which is what we will do today, using nothing but red channel mixer
So, getting started, take a picture…

Go to Image >> Adjustment >> Channel Mixer.
You will be working with red channel only, to get the green-red picture. Set the following settings:

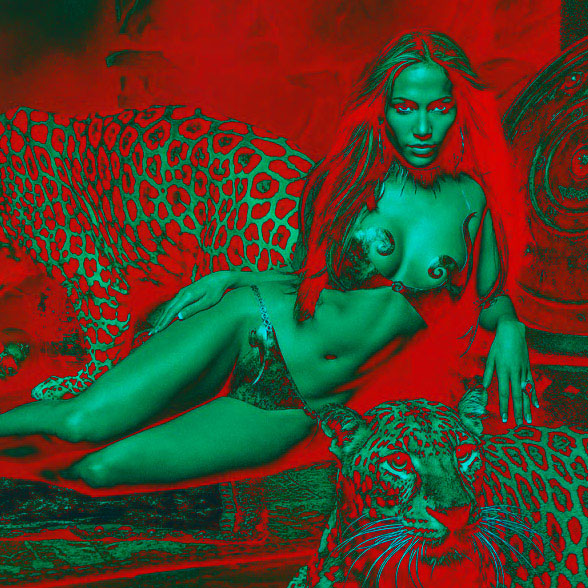
Here is your result so far, negative-like picture, only in a different colors scheme then usual:

Next we are going to duplicate the layer and while the second layer is selected, go to Filter >> Blur >> Lens Blur. lens blur is somehow better than Gaussian blur as it looks more realistic when applied to the image, creating depth of field. Use the following settings:

Next, add Layer Mask to the blurred image. Make sure your foreground color is BLACK, and using a round brush with soft edge (we used about 100 pixel brush), start painting over the canvas, removing the blur from the upper layer.

Just for better visualization, we removed blur from our J Lo and also from tiger’s face, so this is how (more or less) your blur application should eventually look:

While the upper layer (blurred) is still selected, go to Image >> Image Adjustments >> Levels. Select the RED channel and remove red shades as much as possible, we pretty much pushed it to zero.

Click on “Create new fill or adjustment layer” icon at the bottom of your layers panel

This one should be created on top of all the other layers:

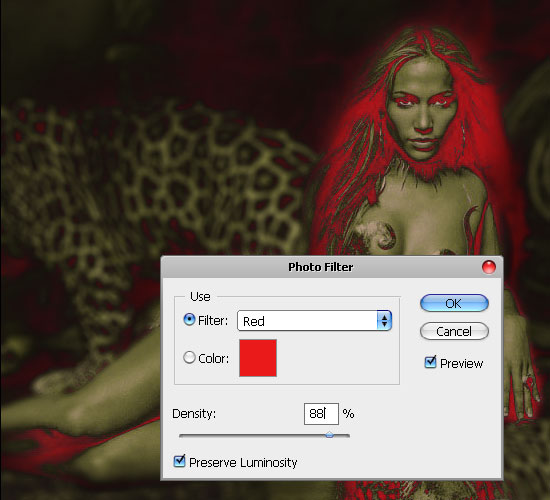
Set the photo filter to RED to give the picture a very warm, slightly natural feel… Don’t use 100% density as it will look a bit overdone, we used 88% here but even 70%+ will do the trick in our case.

And, that is it, you are done! Here is your result, hope you enjoyed this ultra quick tutorial.

.


Not sure about the colors, but I like the overall effect.
The colors are a bit harsh in this tut, but it’s hard to come up with an original combination, most color schemes have already been milled over on good-tutorials 😀
I dont like the colors, but we can use the tutorial to use some other colors. The effect is cool.
I think I went wrong on the step where im supposed to add a layer mask. I never did that before. I just used the rectangle marquee tool and drew a square around my pic and selected reveal all and painted over like you said. I also had no idea how to remove the blur.
dont bother about the colors, but at the end your come up with wonderful effects. i like it a lot.
sorry but frankly speaking, the end result is horrible.
Well, if the colors ain’t your style or type, then mix it up with other colors as well. The methodology and the technique on how it is done is simply awesome, nonetheless.